Studio overview
What Studio is: the scene-to-zone-to-layers-plus-layout model and the two-column composition workspace.
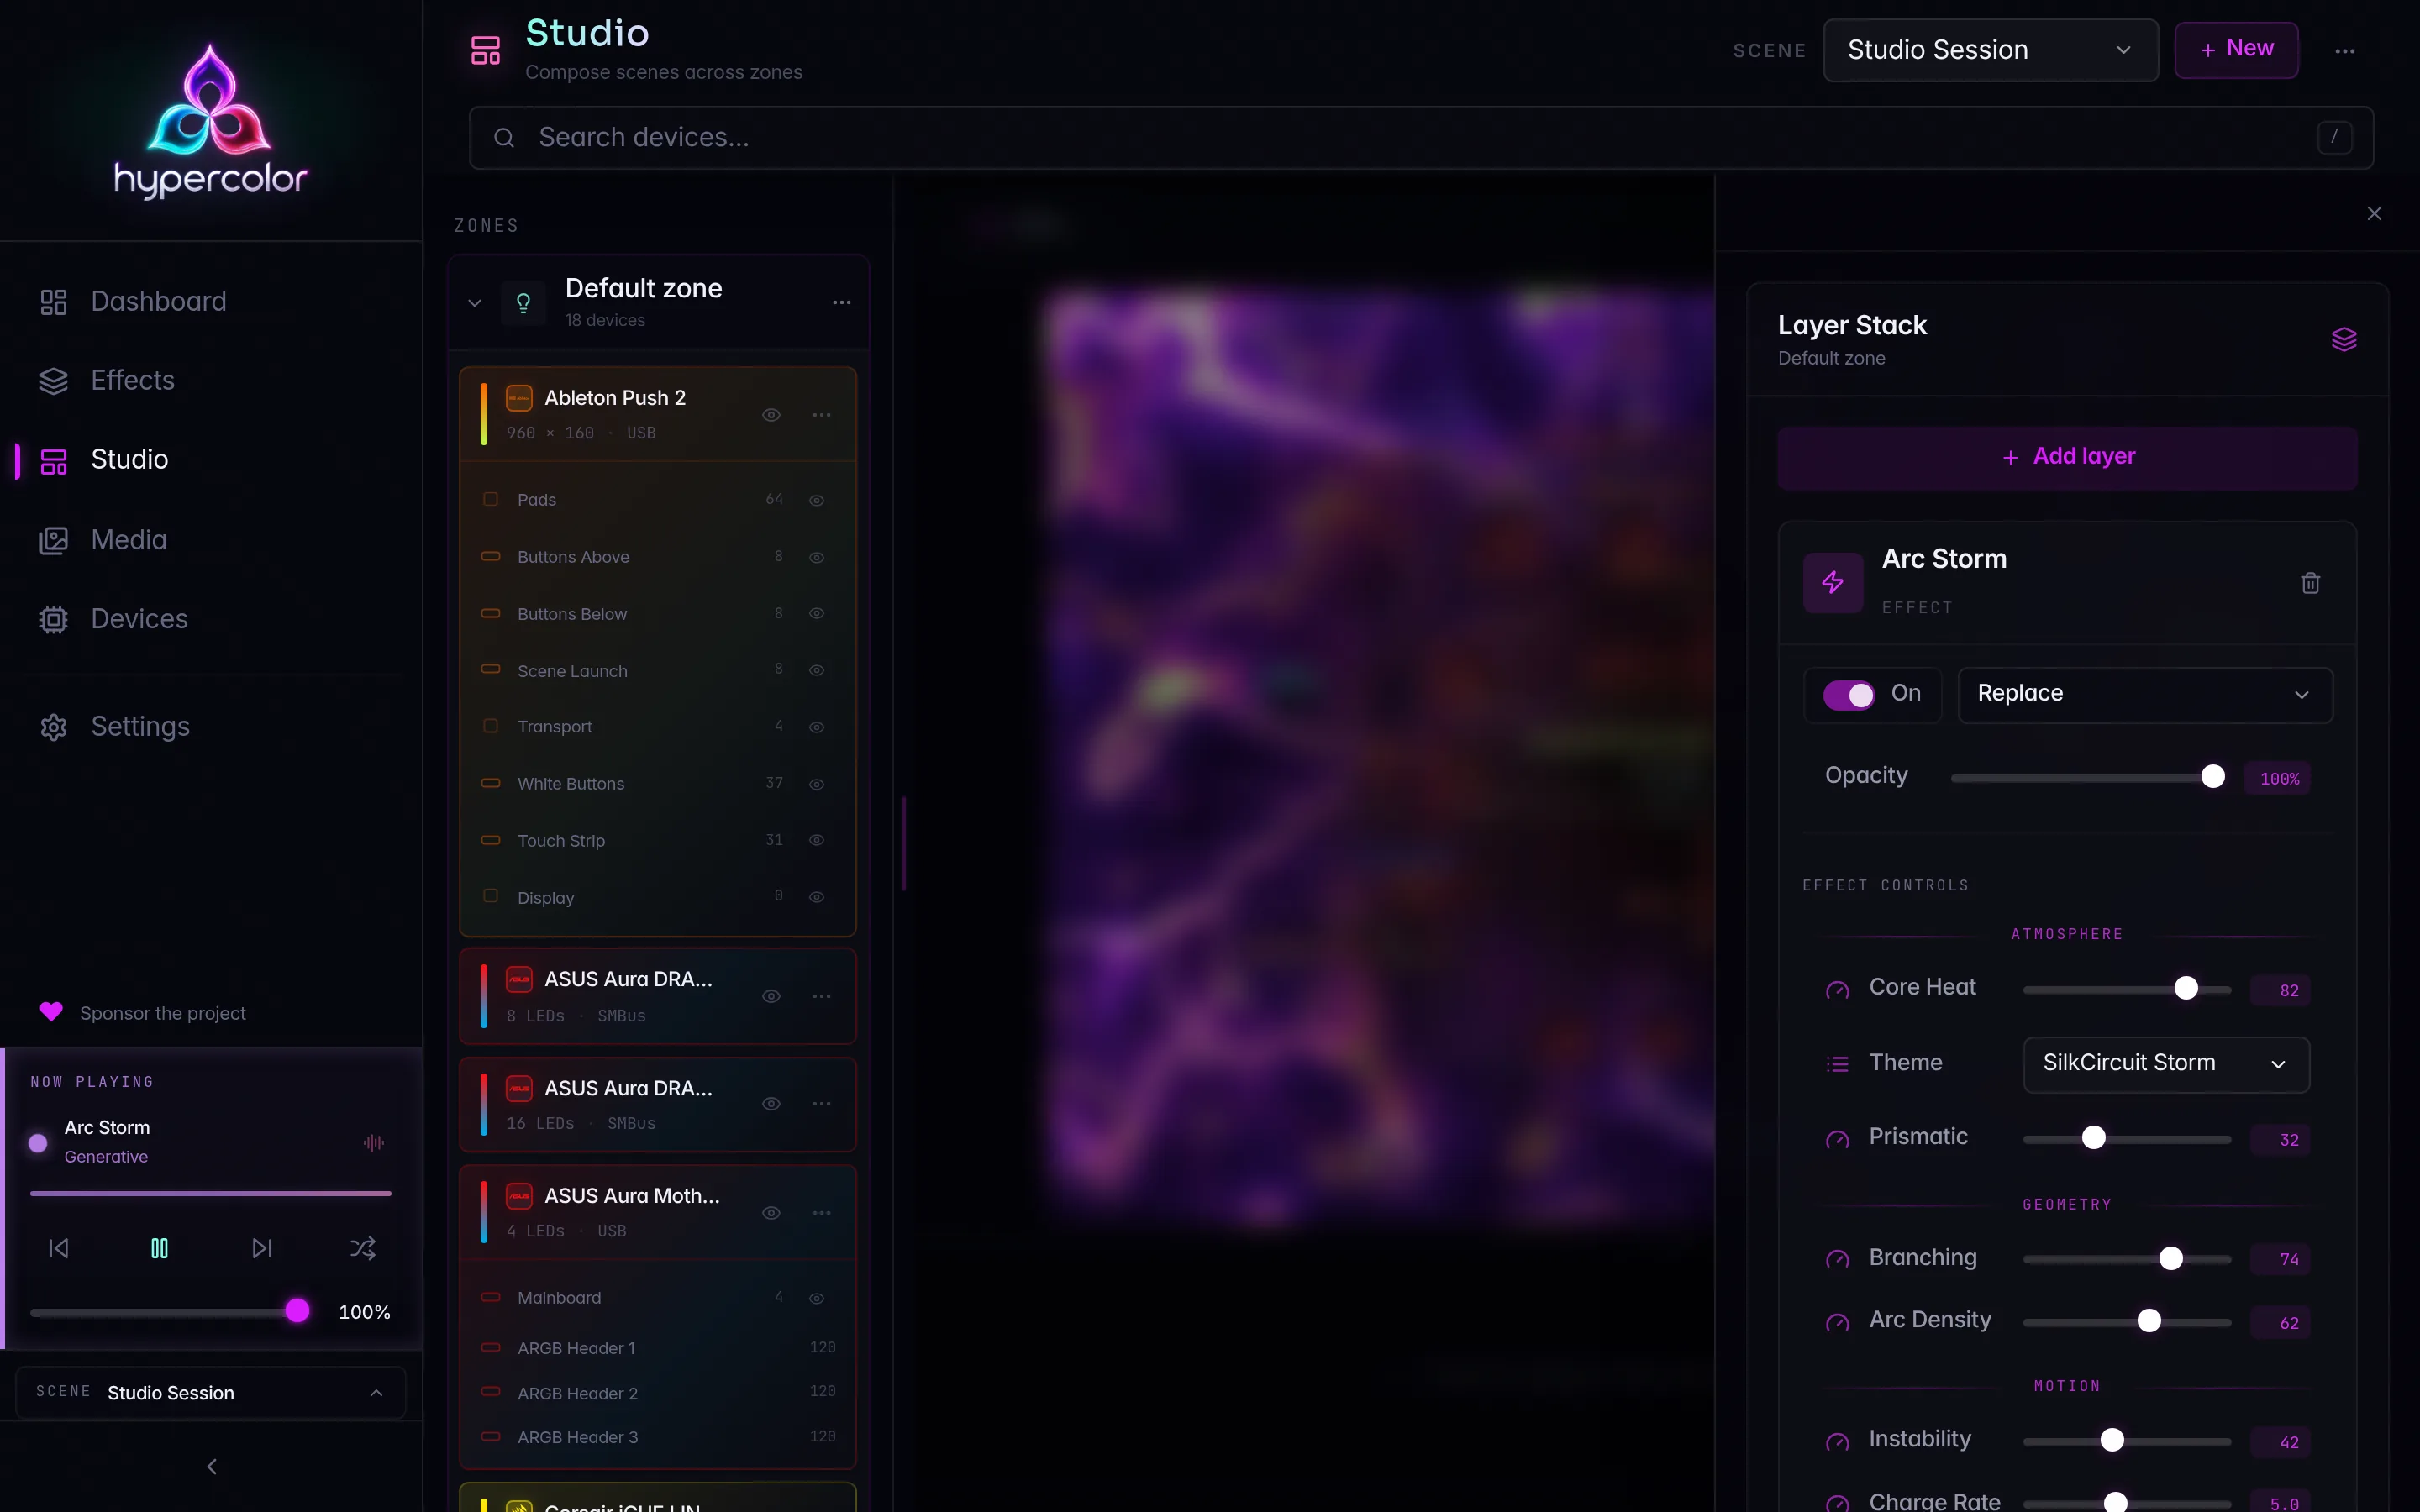
Studio is where you compose what your lights actually do. Open it from the sidebar and you land in a two-column workspace: a zone tree on the left, a live Stage in the center. Pick a zone, see it render, and build it up from there. Everything you arrange in Studio belongs to one scene, the whole-rig configuration that drives every connected device.
The mental model is four words deep, and it is worth holding onto before you touch anything:
- A scene is the top-level object. Exactly one is active at a time, and it owns everything below it.
- A scene contains one or more zones. A zone is a flexible partition of your rig, the switchable unit you select, name, and compose independently.
- Each zone carries a stack of layers (its inputs: an effect, a face, media, a screen capture, a color) and its own layout (the spatial canvas where the zone’s device outputs live).
- A device is the physical hardware. Its outputs get placed onto a zone’s layout, one output in exactly one zone at a time.
That hierarchy is the entire model. The rest of Studio is just the surface that lets you edit it.
#Scenes are whole-rig configs
A scene is the complete picture of what your lighting is doing right now. When you switch scenes, the whole rig changes at once. There is always exactly one active scene, and Studio shares it with the rest of the app. Switch or edit a zone from the dashboard, the command palette, or the CLI, and Studio reflects it immediately because all of them read the same active scene.
This is deliberately not smart-home language. A scene is not a room and it is not a preset for one corner of your desk. It is the full configuration of everything you own, captured as one switchable unit. For the full lifecycle of switching, creating, renaming, and deleting scenes, see scenes.
#Zones partition the scene
Inside a scene, zones let you drive disjoint parts of your rig independently. One zone can run a screen-mirror effect on the keyboard while another runs ambient plasma on the case fans and a third pulses room strips to music. Each zone is a name, a set of assigned device outputs, and its own layer stack.
Every scene has a Default zone to start with. It holds every LED output until you split things out into more zones. A fresh single-zone setup keeps the whole workspace quiet: there is no zone management to learn, because the Default zone is the only row in the tree. Add a second zone and the multi-zone affordances appear, reusing the exact controls you already know.
The unit of assignment is a device output, not a whole physical device. A multi-channel controller can have one channel in one zone and another channel somewhere else. An output lives in exactly one zone’s layout at a time, so dragging it into another zone moves it rather than copying it.
Zone creation and device assignment light up only when the running daemon advertises the matching capabilities. On a single-zone setup you will see just the Default zone, which is the complete, working baseline rather than a stripped-down mode.
For the full zone lifecycle (create, rename, color, enable, delete, and the Unassigned entry), see zones. For moving devices between zones, see device assignment.
#Layers and layout are what a zone holds
Selecting a zone loads two things: its layer stack and its layout.
The layer stack is the zone’s set of inputs. You stack an effect, drop a gif on top, blend a screen capture underneath, and the compositor renders the result. Layers are authored bottom to top, with blend modes, opacity, and per-layer transform and color controls. The layer stack opens as a slide-over panel over the Stage when you want it, so it never crowds the workspace while you are just watching the preview. See layers for the full stack editor.
The layout is the zone’s own spatial canvas, where each of the zone’s device outputs is placed, sized, and rotated. For a lighting zone, the Stage is the layout editor: the live effect renders right under the device boxes so you see exactly how the composition maps onto your hardware. Layouts use normalized [0.0, 1.0] coordinates, so they stay resolution-independent. See layouts for the spatial builder.
A zone that drives a device screen (a Corsair LCD, a Push 2) is a Screen rather than a lighting zone. Its Stage shows the live device face, and it has no spatial layout to edit because a single screen has nothing to place.
#The two-column workspace
The workspace is two columns plus an on-demand panel.
┌─ ZONES ─────────┐┌─ STAGE ────────────────────────┐
│ Default zone    ││                                │
│ Keyboard        ││   live spatial layout +        │
│ Case Fans       ││   composited effect preview    │
│                 ││                                │
│ SCREENS         ││   [ now-playing chip ]         │
│ Corsair LCD     ││     ↑ opens the layer panel    │
│                 ││       as a slide-over          │
│ + New zone      ││                                │
└─────────────────┘└────────────────────────────────┘
The left column is the zone tree: a Zones section for lighting zones, a Screens section for device faces, and the controls to add and manage them. The column width is draggable and persists per browser. On narrow viewports it collapses into a slide-over drawer behind a “Zones” toggle.
The center column is the Stage. It drives off whatever zone you have selected: a lighting zone shows the spatial layout with the live effect under it, a Screen shows the live face. The now-playing chip on the Stage opens the composition panel, a slide-over that hosts the layer editor over the Stage instead of occupying a permanent rail. There is no separate Preview/Layout toggle and no fixed layer column; the Stage is the always-on editor, and layers slide in when you ask for them.
Your selected lighting zone is also the app-wide effect apply-target. Apply an effect from the dashboard, sidebar, or command palette while a zone is selected in Studio, and it lands in the zone you are composing. A Screen or the Unassigned entry is not an apply target, so selection there falls back to the Default zone.
#Where to go next
- Take the guided workspace tour of every part of the live UI.
- Learn scenes and zones, the two halves of the model.
- Build a composition with layers and arrange it with layouts.
- Walk a full split-rig setup end to end in the multi-zone walkthrough.
- For the architecture behind it all, see Studio architecture.