Your first session
Hands-on walkthrough from daemon start to a saved, audio-reactive setup: devices, effects, layouts, scenes, and Studio.
This tutorial assumes installation is complete and the hypercolor binary is in your PATH. If you haven’t built Hypercolor yet, start with Installation. Each section builds on the last. By the end you’ll have a running daemon, connected devices, an active effect, a spatial layout, and reusable live and snapshot scenes. That’s the point at which Hypercolor is genuinely set up.
#1. Start the daemon 🌊
The daemon is the process that drives everything: it talks to your hardware, runs the render loop, and serves the REST API on port 9420.
Foreground mode is useful during initial setup because it prints log output directly to your terminal:
just daemonThis runs with the preview build profile, optimized for runtime performance while keeping compile times fast. Press Ctrl-C to stop it. Once you’re comfortable with the setup, the service commands below are the better everyday path.
Background service (the normal everyday path):
hypercolor service start
hypercolor service status
Confirm the daemon is responding:
curl http://localhost:9420/healthA 200 OK response means the daemon is up. All other commands in this tutorial communicate with it over localhost:9420.
Enable autostart on login so the daemon starts automatically after every reboot or login:
hypercolor service enableOn Linux this calls systemctl --user enable hypercolor. On macOS it loads the LaunchAgent plist. See Installation for the full service setup including pre-built packages.
#2. Verify the daemon
Check the current system state:
hypercolor statusThe output shows the render loop tier (which FPS target is active), the active effect (none yet), how many devices are connected, device and effect inventory counts, and frame budget telemetry. Everything should show healthy defaults before you add devices. Pass --watch to get a live-updating view:
hypercolor status --watchThe same information is available via the API if you want to script against it:
curl http://localhost:9420/api/v1/system | jq .data.status#3. Discover and connect devices
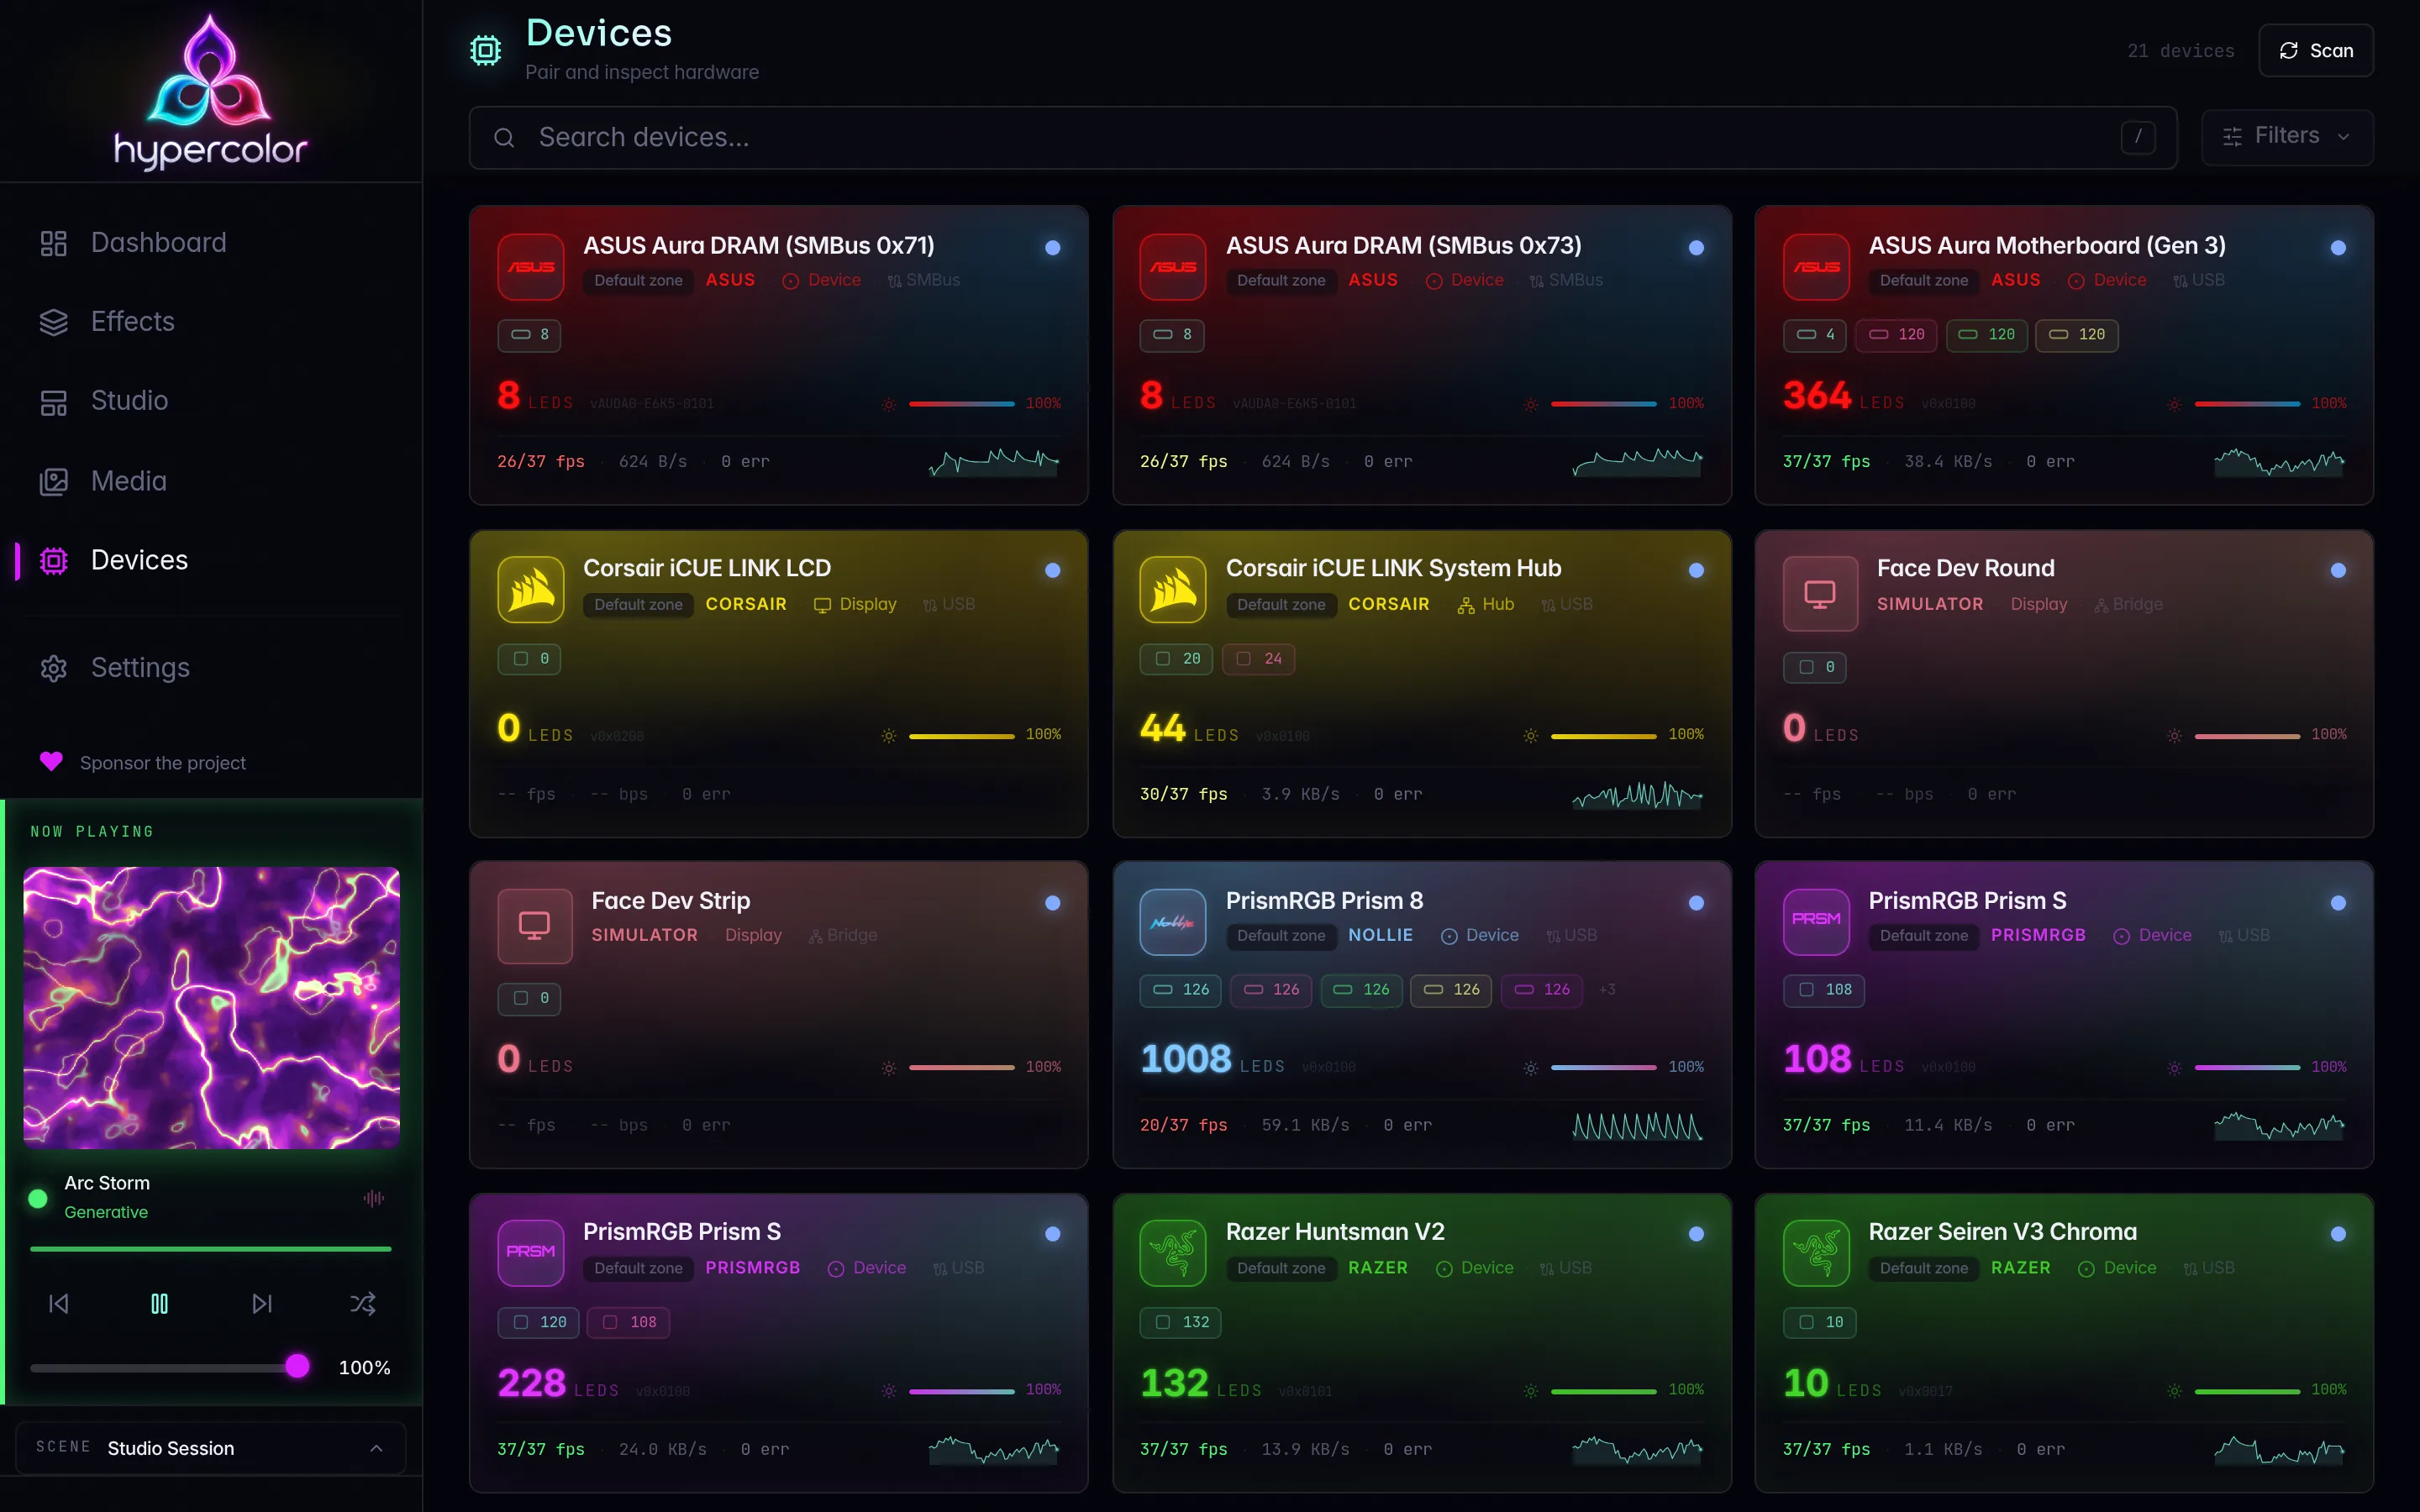
USB HID devices (keyboards, mice, headsets, and strips connected via USB) are discovered automatically at daemon startup, with no manual step required. Network devices like WLED controllers are discovered via mDNS on your local network.
List everything the daemon found:
hypercolor devices listThe table shows each device’s name, driver, route (USB path or IP address), LED count, connection status, and firmware version.
If a device you expect is missing, trigger a manual scan:
hypercolor devices discoverFor network devices on slower or segmented networks, extend the scan window:
hypercolor devices discover --timeout 15You can also target a specific protocol family:
hypercolor devices discover --target wled
hypercolor devices discover --target hue
hypercolor devices discover --target usb
If a USB device is listed but shows a permission error, you may need to install the udev rules:
just udev-installRe-plug the device or log out and back in after installing the rules. For more detail, see Debugging.
If a USB device appears in lsusb but not in hypercolor devices list, check whether another RGB manager such as OpenRGB, Aura Sync, or the openrazer daemon is running. These tools grab the HID device file and Hypercolor cannot take over until they release it.
Identify a specific device by making it flash a test pattern. This is useful when you have multiple devices and want to confirm which physical unit has which ID:
hypercolor devices identify <device-name-or-id>The device pulses for five seconds by default. Pass --duration 10 for a longer window.
#4. Browse the effect library
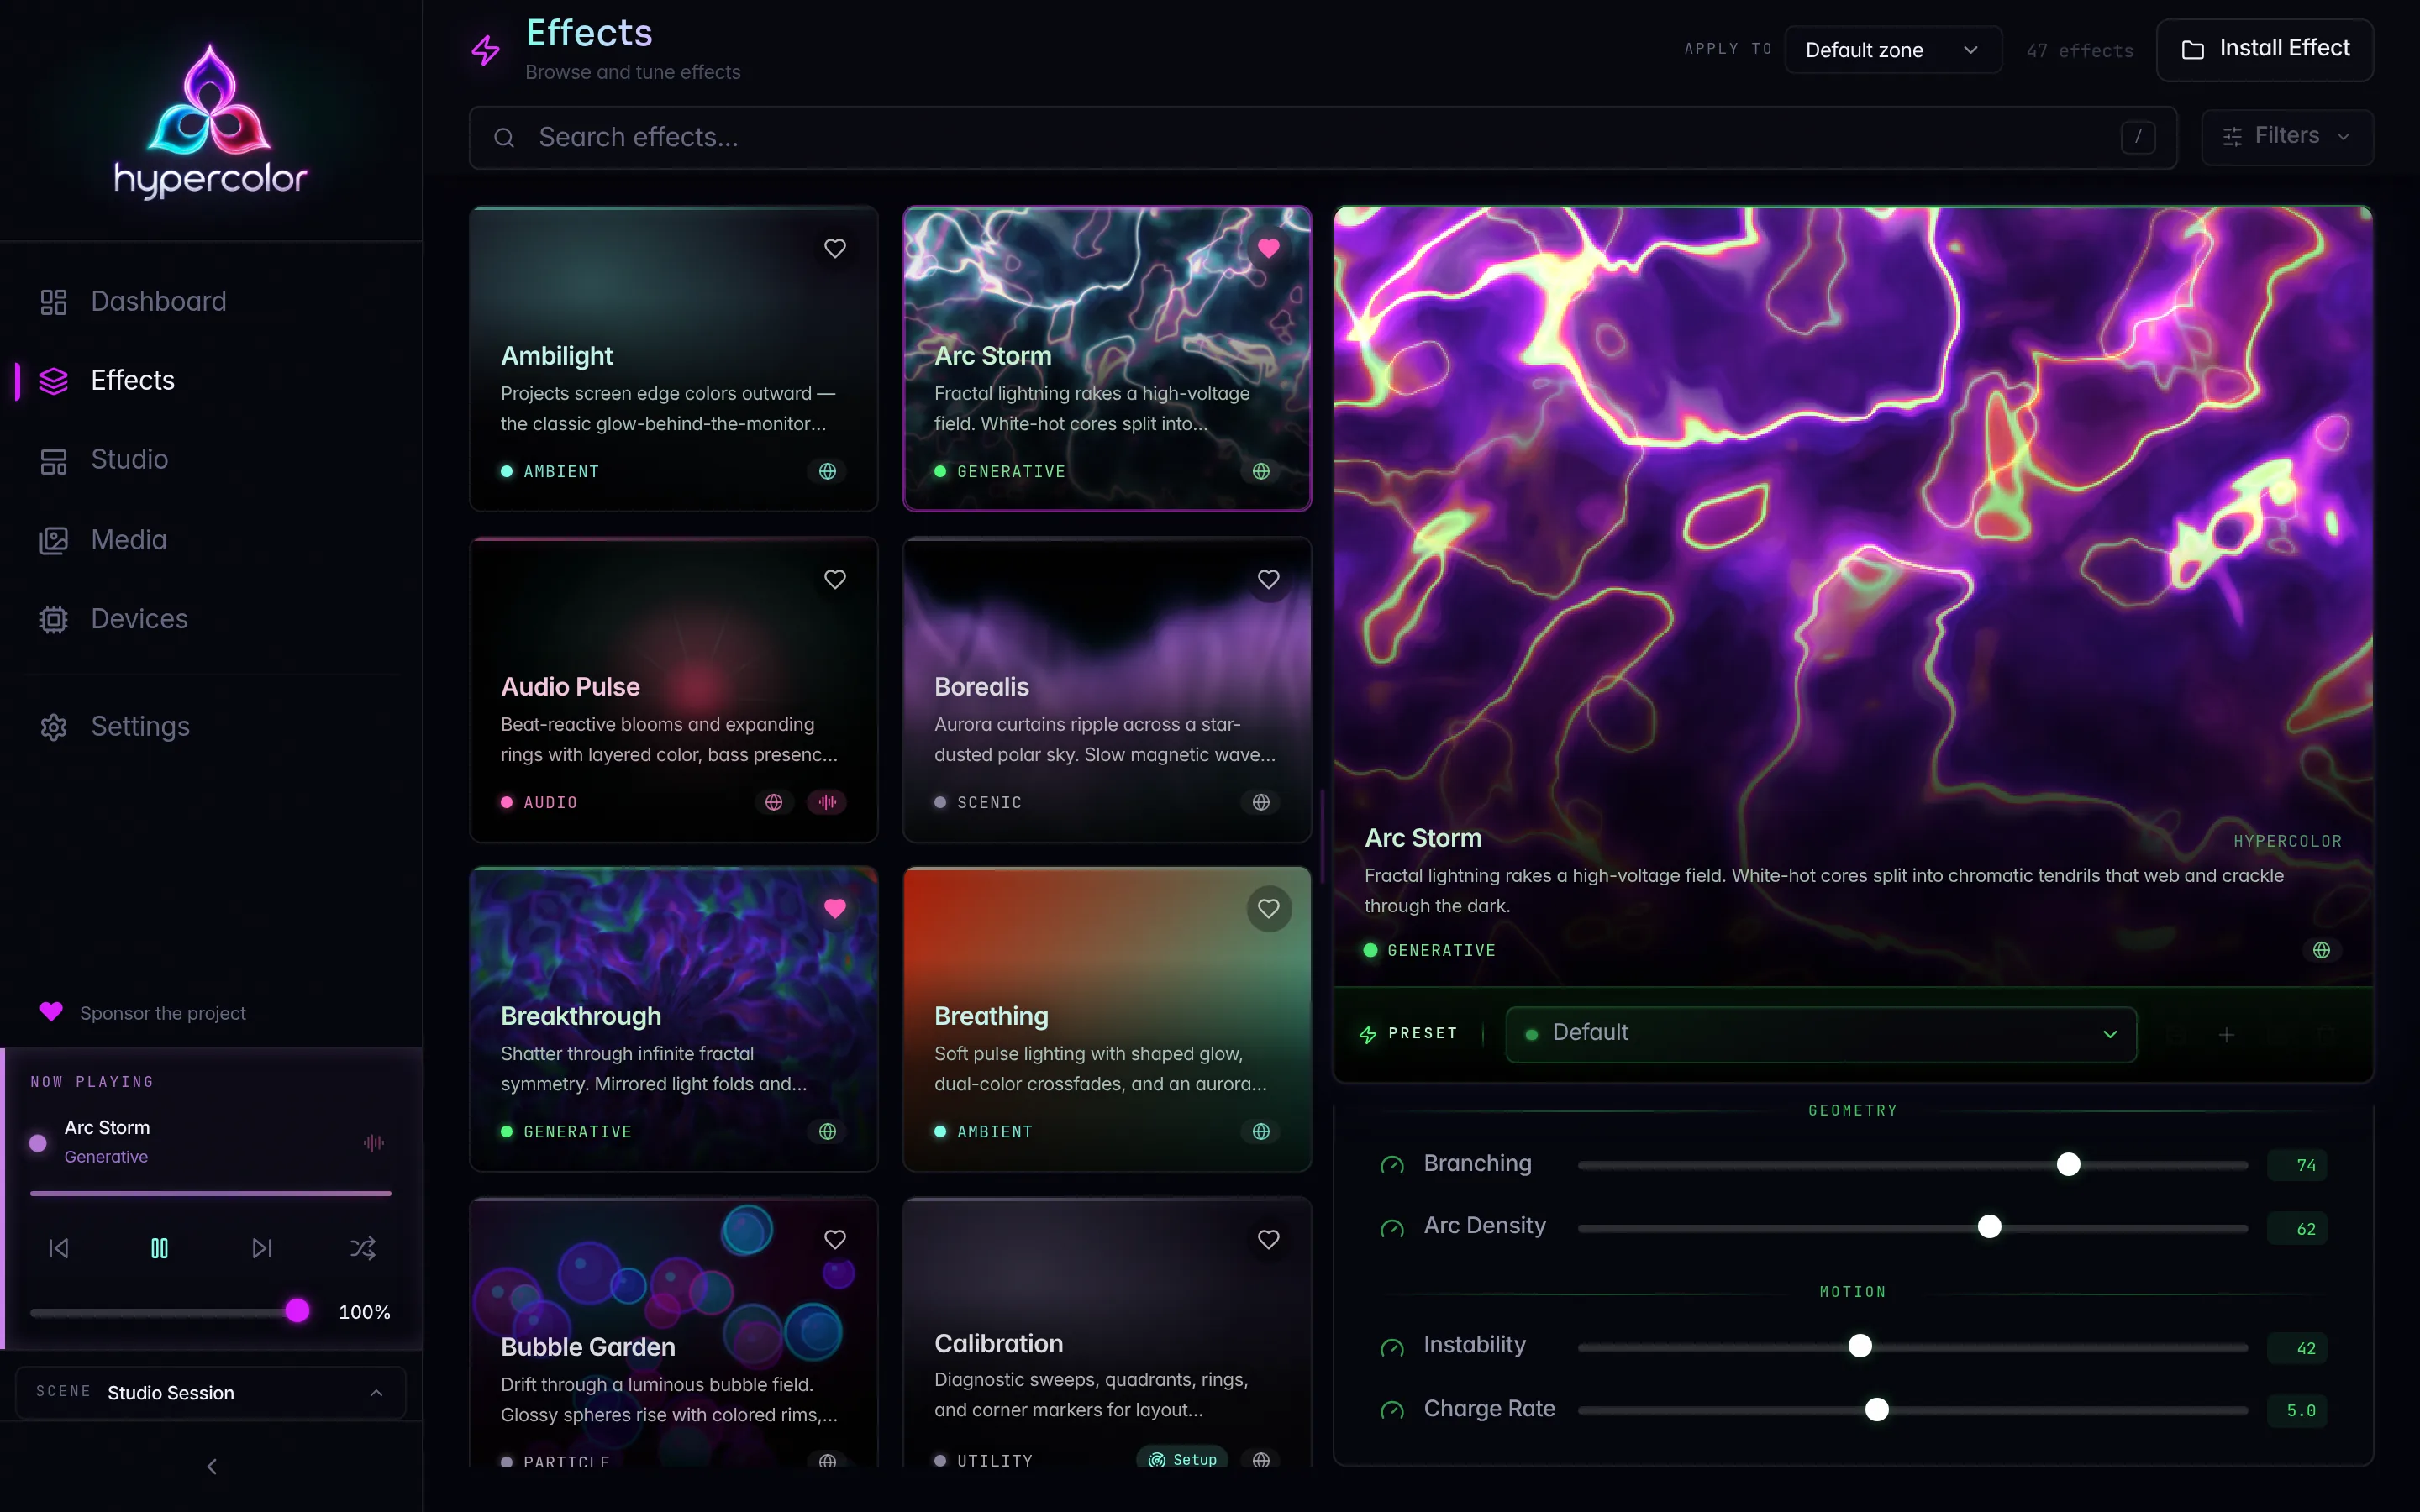
Hypercolor ships with a large catalog of built-in effects spanning audio-reactive visualizers, ambient gradients, particle systems, and procedural animations. The exact count grows with every release, so browse the catalog for the full picture. See the Effects section.
Get the full list via the CLI:
hypercolor effects listA few highlights worth trying first:
borealis: a slow aurora curtain, good for ambient setupsaudio-pulse: a VU meter that reacts to system audiodigital-rain: falling green characters in the matrix stylenyan-dash: nyan cat riding a rainbowbreathing: a gentle sine-wave fade, popular for focus workcolor-wave: a smooth hue rotation across the whole canvas
Filter the list to audio-reactive effects only:
hypercolor effects list --audioSearch by name or description:
hypercolor effects list --search auroraFilter by category:
hypercolor effects list --category ambientIf the daemon is serving the embedded web UI, you can browse the catalog visually at http://localhost:9420. Search, filter by category, and see a live canvas preview before applying anything to hardware.
#5. Apply your first effect
Pick an effect from the list and apply it by name. Names are fuzzy-matched, so partial names work:
hypercolor effects activate borealisThe daemon begins rendering immediately. Verify it took:
hypercolor statusThe “Effect” field should now show borealis. Your connected devices will already be showing the new effect.
To stop the active effect and return to a dark state:
hypercolor effects stopApply an effect with initial parameters. Use --speed and --intensity as shorthand controls, and --param key=value (repeatable) for any other named parameter:
hypercolor effects activate breathing --speed 30 --intensity 70
hypercolor effects activate audio-pulse --param sensitivity=80
Show what parameters an effect exposes:
hypercolor effects info borealis#6. Adjust brightness and effect controls
#Global brightness
Global brightness scales the final output of every device from 0 (off) to 100 (full):
hypercolor brightness set 80
hypercolor brightness get    # read back the current value
This is the coarse knob. Most effects also have their own intensity parameter that works independently.
#Patching controls on a running effect
Use effects patch to change one or more parameters on the currently running effect without re-applying it. The --param flag is repeatable:
hypercolor effects patch --param speed=60
hypercolor effects patch --param speed=40 --param intensity=90
Reset all controls to the effect’s defaults:
hypercolor effects reset#Via REST
Read the live scene first. The document carries the real zone and layer ids that control writes address:
scene=$(curl -s http://localhost:9420/api/v1/scene)
zone_id=$(printf '%s' "$scene" | jq -r '.data.zones[0].id')
layer_id=$(printf '%s' "$scene" | jq -r '.data.zones[0].layers[-1].id')

curl -X PATCH \
  "http://localhost:9420/api/v1/scene/zones/$zone_id/layers/$layer_id/controls" \
  -H "Content-Type: application/json" \
  -d '{"values": {"speed": {"kind": "float", "value": 3.0}}}'
The control patch deliberately has no If-Match header. A replaced layer gets a fresh id, so a stale write returns 404 layer_not_found instead of changing the new effect. To inspect the current values:
curl -s http://localhost:9420/api/v1/scene \
  | jq '.data.zones[].layers[] | select(.source.type == "effect") | .source.controls'
The web UI’s controls panel lets you adjust these with sliders, which is easier for exploration. The REST PATCH and effects patch are the right paths for scripting or keyboard macros.
#7. Build a spatial layout
Without a layout, every device output gets the same averaged color from the canvas, so all your LEDs pulse together as one blob. A layout tells Hypercolor where each output sits in the virtual canvas, so gradients actually flow across your desk from left to right, and a vertical strip gets the top of the canvas while a keyboard gets the bottom.
Canvas coordinates are normalized to [0.0, 1.0], so positions stay valid regardless of the configured canvas resolution.
View existing layouts:
hypercolor layouts listCheck the active layout:
hypercolor layouts activeVia REST (full detail):
curl http://localhost:9420/api/v1/layouts | jq .data.items
curl http://localhost:9420/api/v1/layouts/active | jq
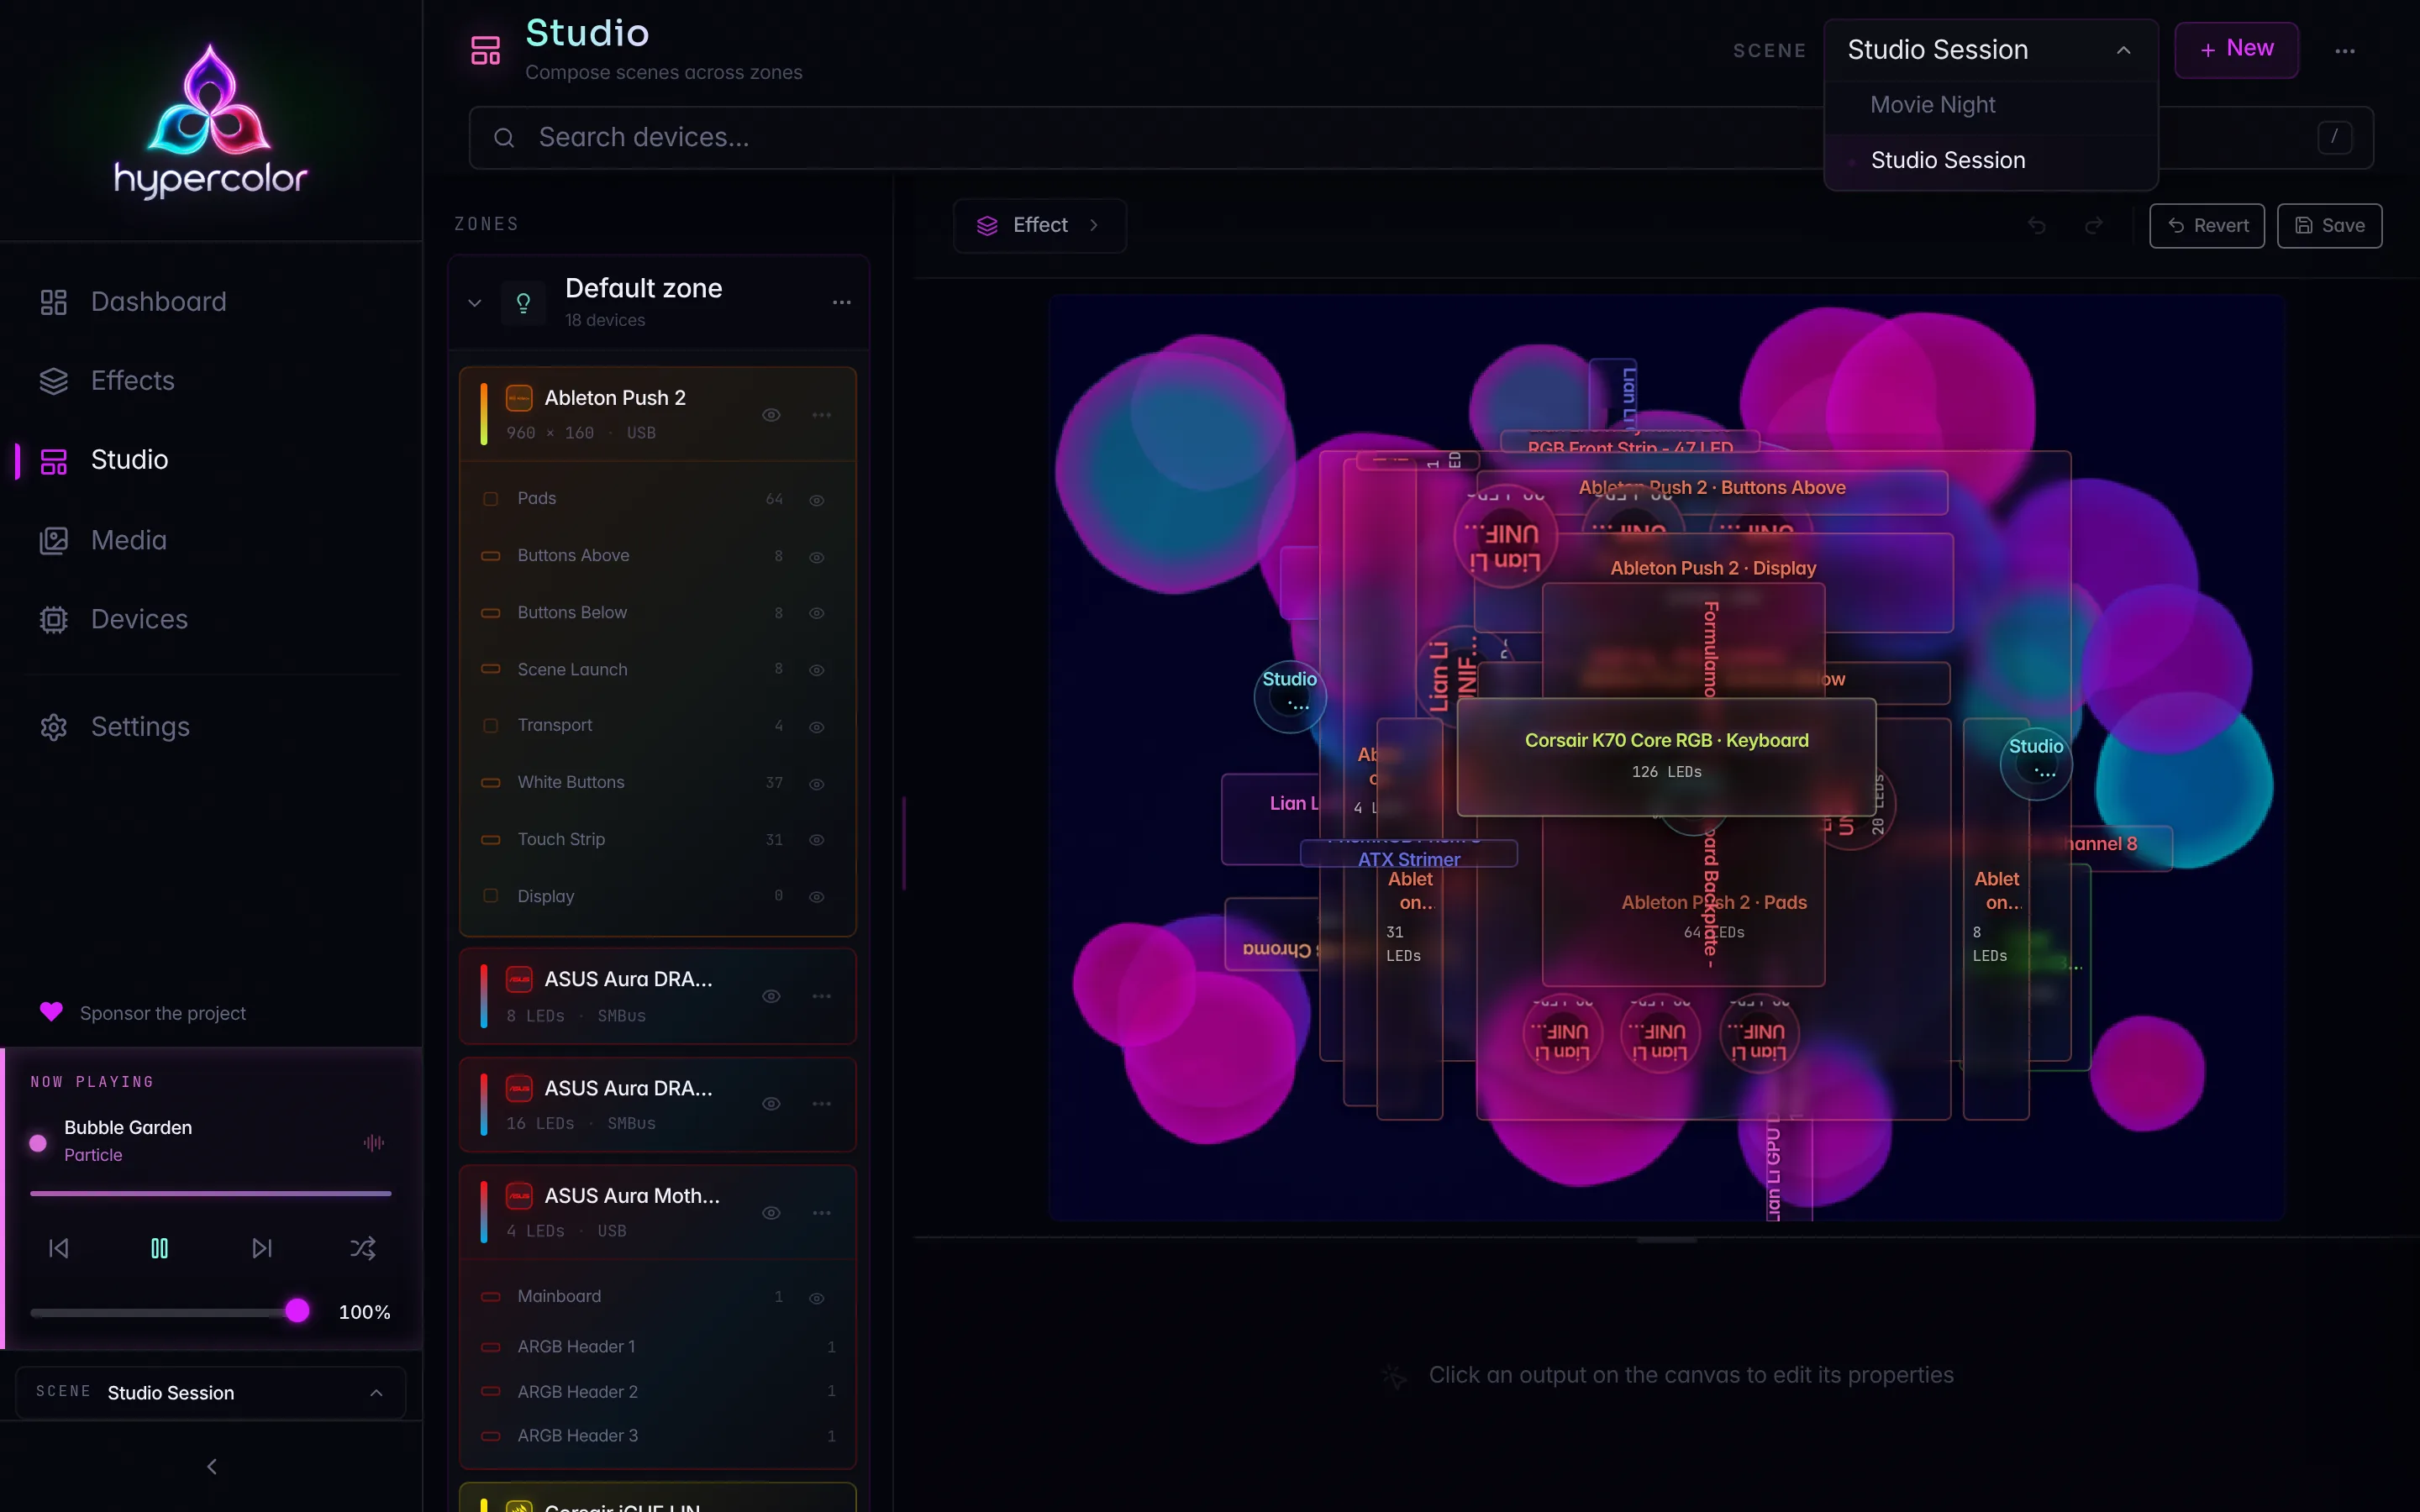
Create a layout from the web UI or via REST with a JSON zone definition. The web UI is the recommended tool here: open http://localhost:9420, go to Studio, select a zone, and drag its device outputs around the Stage canvas. Once you’re satisfied, save the layout from the Stage toolbar.
From the CLI, you can create a layout by providing a JSON definition:
hypercolor layouts create --name "My Desk" --data '{"zones": [...]}'Apply an existing named layout:
hypercolor layouts apply "My Desk"Preview a layout without making it active:
hypercolor layouts preview "My Desk"Delete a layout you no longer need:
hypercolor layouts delete "Old Layout"The Studio workspace offers a full visual editor for spatial layouts. Open http://localhost:9420, click the Studio tab, and drag device outputs into position on the selected zone’s Stage canvas. See Studio overview and Layouts for the full walkthrough.
#8. Set up audio-reactive effects
Audio-reactive effects like audio-pulse, cymatics, and frequency-cascade analyze your system audio in real time and drive the render loop from it. The daemon captures audio via a PipeWire/PulseAudio monitor source: the loopback of your speakers, not a microphone.
Apply an audio-reactive effect and watch the lights respond to whatever is playing:
hypercolor effects activate audio-pulseIf the effect doesn’t react, the most common cause is that the audio capture device is wrong. First confirm the daemon sees an audio source at all; status exposes an audio_available flag:
curl http://localhost:9420/api/v1/system | jq '.data.status.audio_available'Then list the capture devices the daemon can see and check which one it picked up:
hypercolor audio devicesYou can also inspect the live spectrum in the terminal UI (see the terminal UI guide). The spectrum panel updates in real time and is the fastest way to confirm audio capture is working.
For a full guide to configuring audio sources, see Audio setup.
#9. Capture a scene snapshot
Once you have the rig tuned, capture the live scene as a named snapshot:
hypercolor scenes snapshot "Gaming"The snapshot preserves zones, layers, control values, device assignments, display faces, and the active named layout. Global output brightness remains separate.
Add a description when you want to annotate what the snapshot is for:
hypercolor scenes snapshot "Focus" --description "Breathing effect for deep work"Switch between scenes:
hypercolor scenes list
hypercolor scenes activate "Gaming"
Scene activation uses the transition stored in the scene.
Delete a scene when you no longer need it (requires --yes to confirm):
hypercolor scenes delete "Gaming" --yesInspect a scene’s contents:
hypercolor scenes info "Gaming"The daemon restores the last active scene on startup by default. See Configuration for how to change the start_scene behavior.
#10. Create a scene
Scenes are whole-rig lighting configurations that can be activated manually or switched programmatically. A scene holds the full lighting state (active effect, control values, layout, and zones) and can be recalled at any time by name.
Create a scene:
hypercolor scenes create "Focus Mode"Add an optional description and set the mutation mode:
hypercolor scenes create "Late Night" --description "Dim amber for late sessions"Activate a scene manually:
hypercolor scenes activate "Focus Mode"Scene activation uses the transition stored in the scene. Pass --transition <ms> to override its duration for this activation only; the scene’s stored transition is left untouched.
Return to the Default scene:
hypercolor scenes deactivateList configured scenes:
hypercolor scenes listCheck the currently active scene:
hypercolor scenes activeDelete a scene (requires --yes):
hypercolor scenes delete "Old Scene" --yesFor live and snapshot mutation modes, boot restore, and external automation, see Scenes and snapshots.
Studio is the visual authoring surface for scenes. The Studio workspace lets you build multi-zone scenes with per-zone effects, inspect the composition in a live canvas preview, and manage scene groups without writing JSON. See Studio scenes and Studio zones.
#11. Tour the web UI
Open http://localhost:9420 in a browser. The daemon serves the embedded Leptos web UI directly, with no separate server process required.
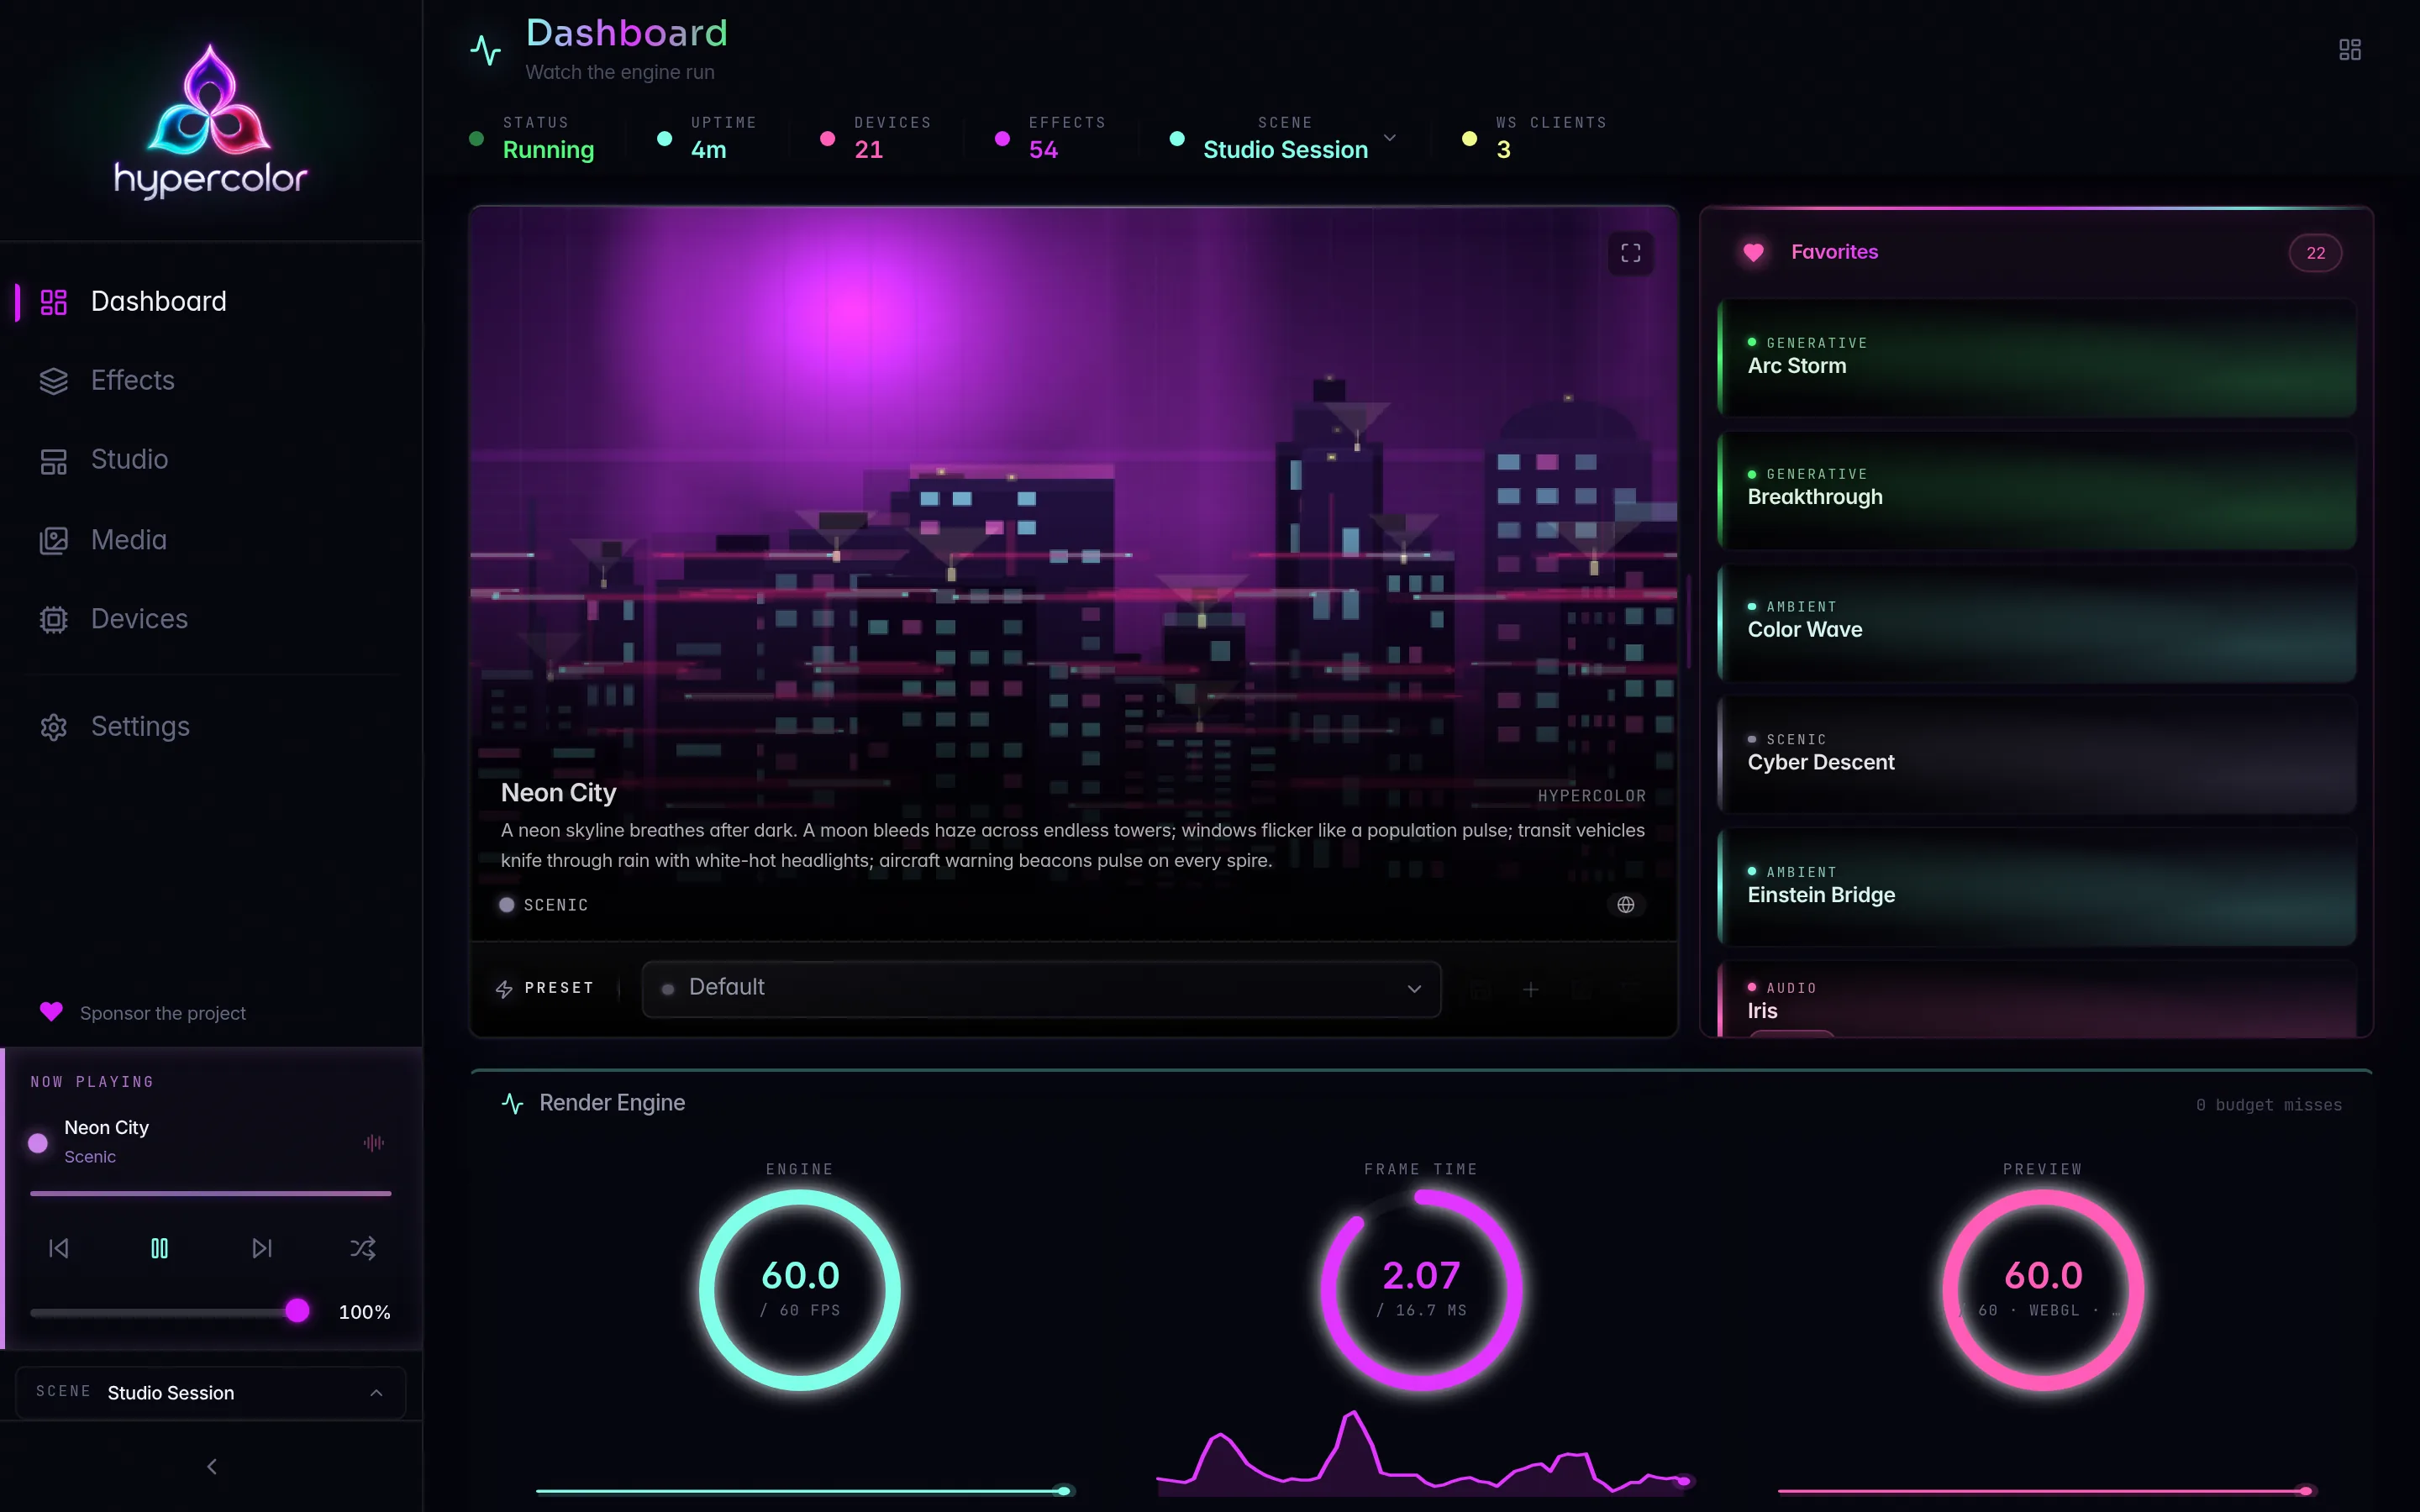
The UI is organized into panels:
- Effects browser: search and filter the full effect catalog, preview effects in the canvas panel before committing to hardware
- Controls panel: per-parameter sliders for the active effect; equivalent to
effects patchbut much easier for exploration - Devices panel: connection status for every discovered device, per-device brightness, and an identify button to flash a test pattern
- Studio Stage: the spatial layout editor, always on for the selected lighting zone; drag, resize, and rotate that zone’s device outputs on its own canvas
- Scenes: the Studio header’s scene selector creates, renames, deletes, and switches scenes, and the dashboard’s scene pill switches between them; snapshotting the live rig is CLI and REST only (
hypercolor scenes snapshot) - Studio: the full multi-zone authoring workspace (see below)
The canvas preview shows exactly what the render loop is producing, updated at the daemon’s current target FPS.
#12. Try Studio
Studio is the advanced authoring workspace inside the web UI. It goes beyond applying a single effect to all devices: in Studio you build per-zone effects that compose into a full rig, with a live canvas preview showing you exactly what the render will produce before it hits hardware.
Open Studio from the top navigation, or navigate directly to http://localhost:9420 and click the Studio tab.
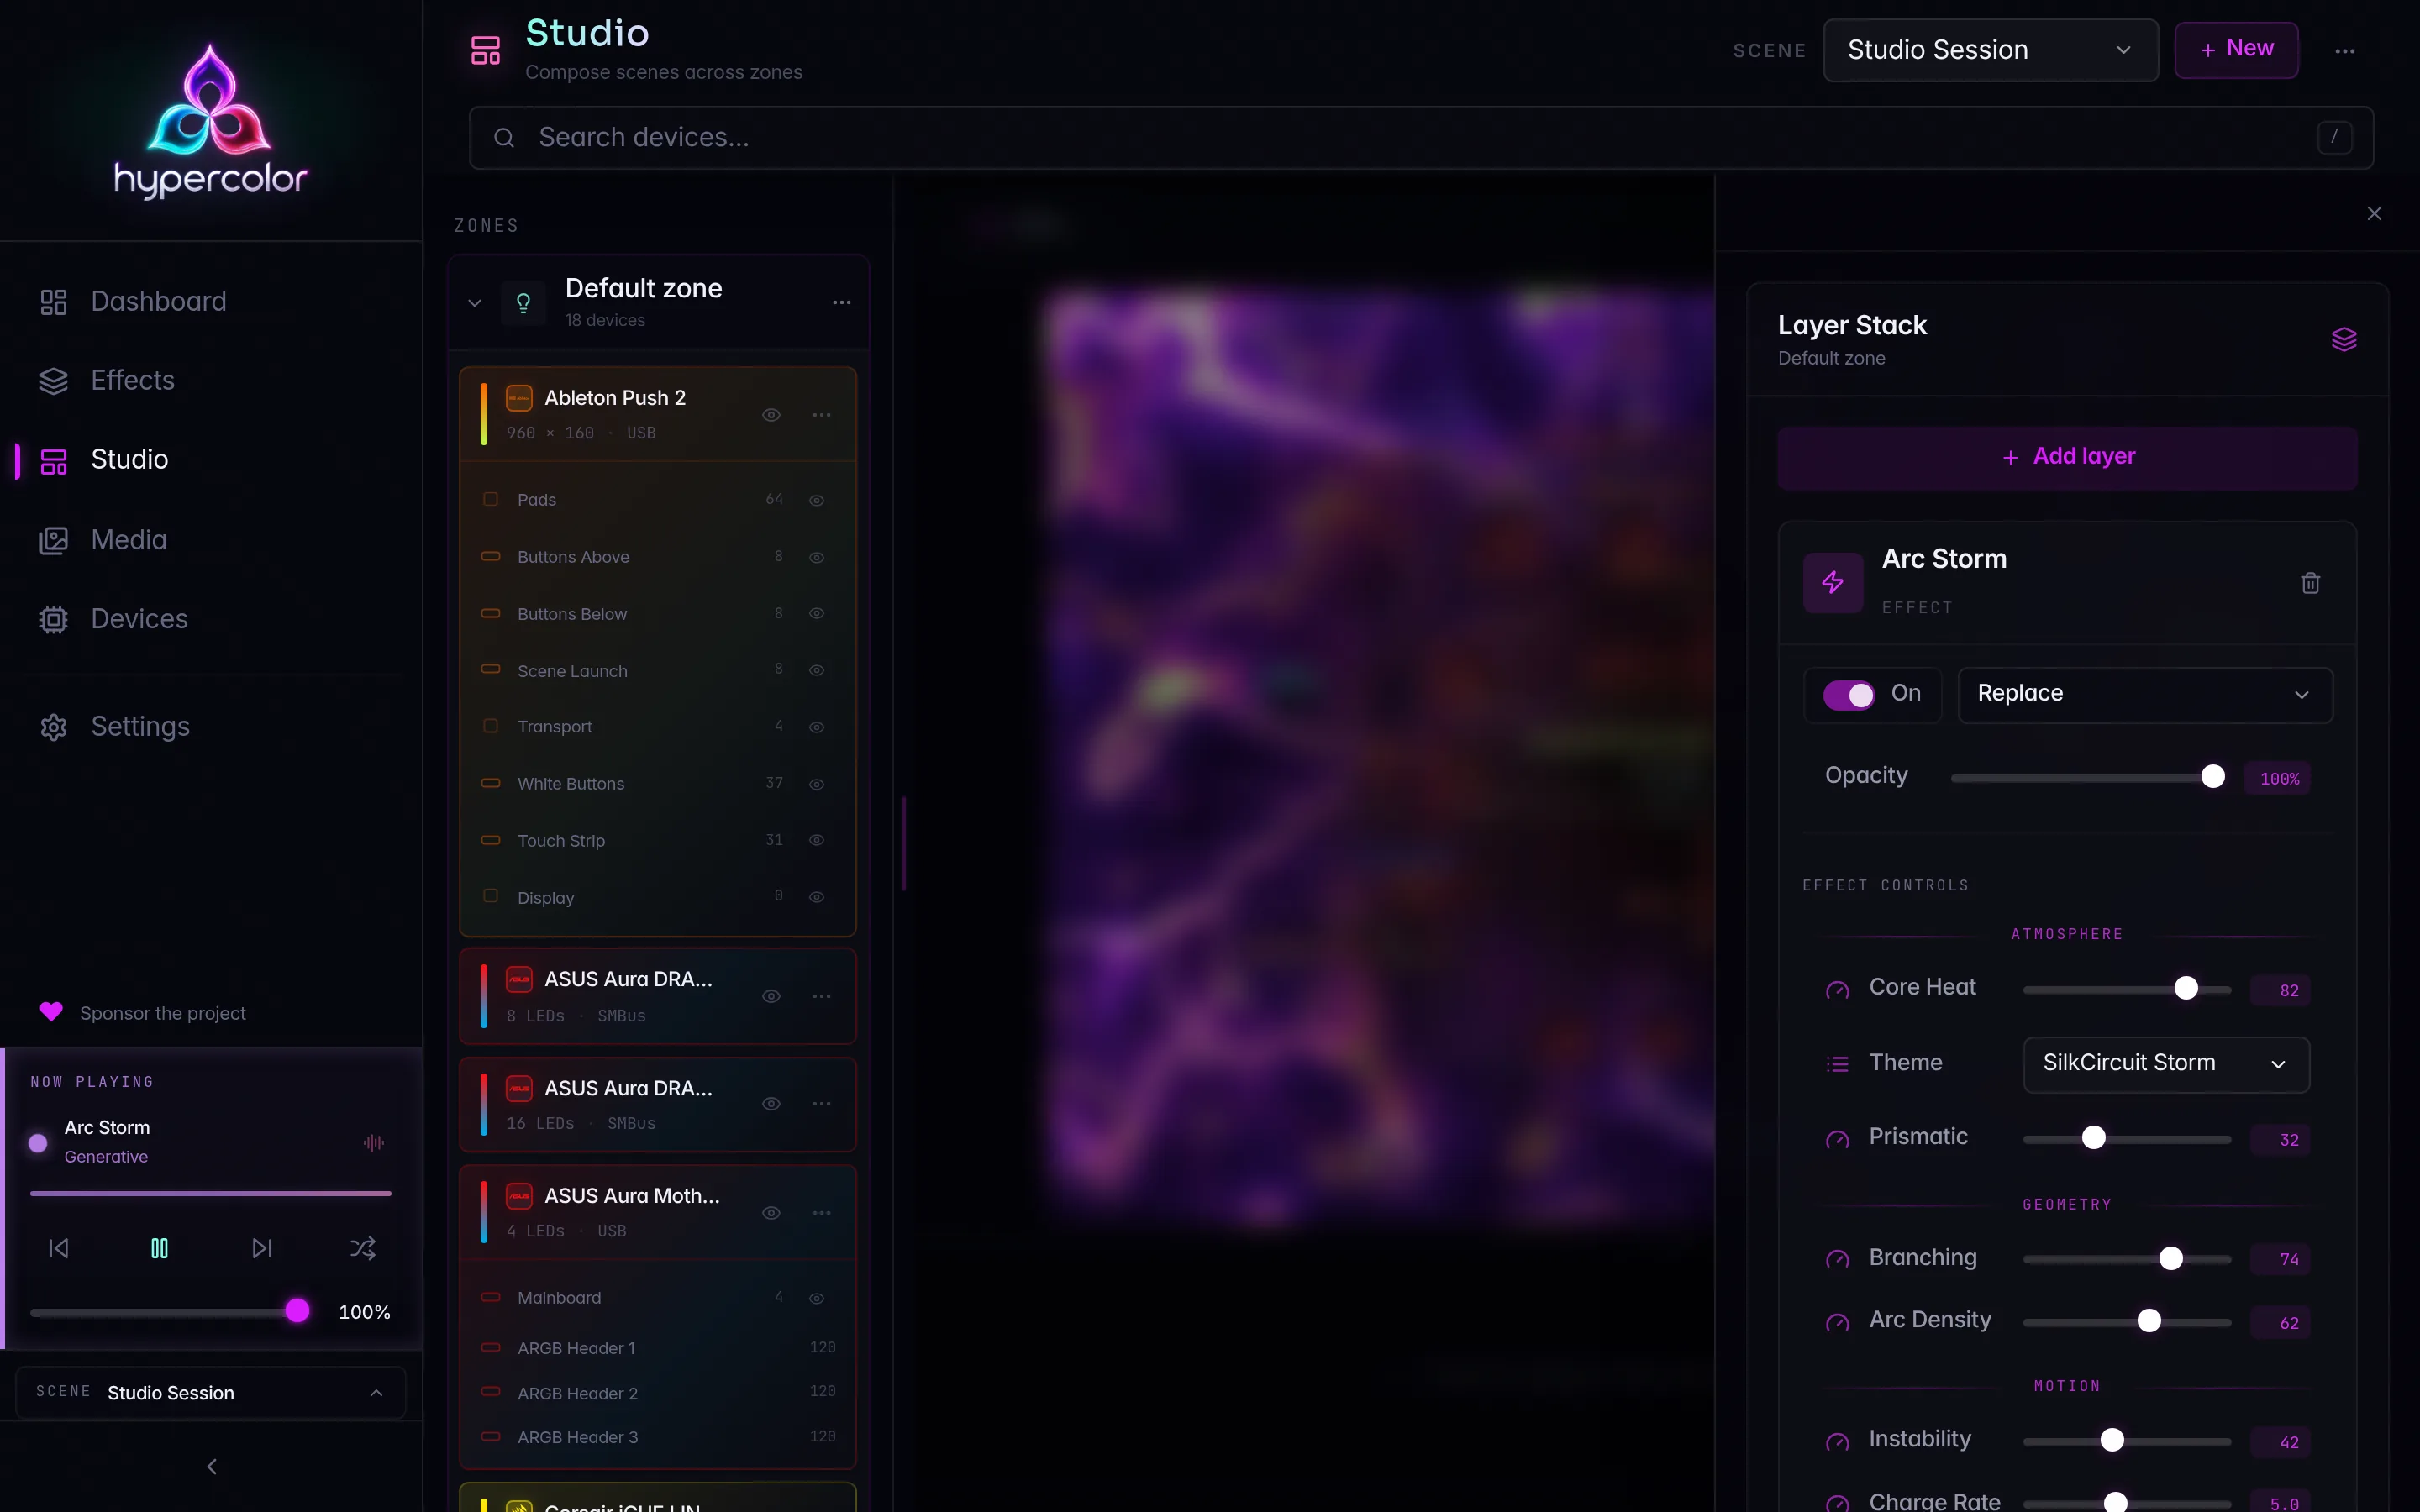
What Studio adds on top of the basic effects browser:
- Zone canvas: position and resize device outputs visually; zones are flexible canvas partitions, not rooms
- Per-zone effect layers: assign a different effect to each zone, with independent control values and its own bottom-to-top layer order
- Layer compositing: stack effects with blend modes to create layered lighting compositions
- Scene authoring: save the full multi-zone composition as a scene that can be recalled with one click
- Display faces: when an effect supports it, you can target specific display faces (front, top, rear) of a device; see Display faces for how effects declare and use face geometry
For the full Studio walkthrough, see Studio overview and the workspace tour.
#13. Tour the terminal UI ⚡
Hypercolor also ships an interactive terminal dashboard built with Ratatui. Launch it:
hypercolor tuiThe TUI connects to the running daemon via WebSocket and shows:
- A live canvas preview rendered with the terminal’s best graphics protocol (Kitty, Sixel, or iTerm2), with a text-block fallback for terminals without graphics support
- A spectrum analyzer panel showing the live audio FFT, updated in real time
- A device list and status sidebar
- An effect selector with keyboard navigation: navigate with arrow keys, activate with Enter
- All changes sync to the daemon immediately, so the web UI and any REST clients see the same state
Exit with q or Ctrl-C.
#14. What’s next
You now have a fully configured Hypercolor setup. Where to go from here:
- Scenes and snapshots: conceptual guide and full CLI/API reference for saved configurations
- Audio setup: configure monitor or loopback sources for audio-reactive effects
- Studio overview: multi-zone authoring, scene groups, the visual zone canvas, and the Studio workspace tour
- Creating effects: write custom effects with the TypeScript SDK and see them appear in the effect browser immediately
- Display faces: how effects target specific geometry faces on multi-face devices
- Hardware: Compatibility matrix: check driver status for every supported device family
- Configuration: full config reference covering audio device selection, daemon network settings, scene storage, and config hot-reload behavior
- API reference: full REST and WebSocket API documentation for scripting and third-party integration