Guide
Get set up, get lit. Pick your install path and your interface, then go from zero to RGB.
Hypercolor is an open-source RGB lighting orchestration engine for Linux, Windows, and macOS, written in Rust. One app drives every RGB device you own (Razer peripherals, WLED strips, ASUS motherboards, Corsair gear, Philips Hue, Nanoleaf panels, Govee lights, and more), all running from the same render engine at up to 60 fps.
Effects are HTML Canvas pages rendered by an embedded Servo browser. Audio FFT, screen capture, and keyboard input feed the render every frame. A spatial sampler maps canvas pixels onto your physical LED positions. The result: one effect paints your whole rig, synchronized, regardless of how many devices or protocols are involved.
#⚡ Where to start
Your path through this guide depends on two questions: how you’re installing, and which interface you prefer.
#Pick your install path
Not everyone needs to build from source. The right starting point depends on your OS and your goals.
| If you are… | Start here |
|---|---|
| A Linux user who wants a quick install | Choose your install → prebuilt one-liner |
| On Windows or macOS | Choose your install → desktop package |
| Running Arch Linux | Choose your install → AUR package |
| A developer hacking on Hypercolor itself | Installation → build from source |
#Pick your interface
Hypercolor has six entry points. Understanding which one you want saves a lot of confusion.
| Interface | What it is | When to use it |
|---|---|---|
| Desktop app | Tauri shell that owns the tray, supervises the daemon, and renders the web UI natively | The recommended starting point on Windows and macOS; available on Linux too |
| Web UI | Leptos app served by the daemon at http://localhost:9420 | Daily use: browsing effects, tweaking controls, managing layouts |
| TUI | Ratatui terminal dashboard with live LED preview and audio spectrum | SSH sessions, headless setups, or if you live in the terminal |
| CLI | hypercolor binary for scripting and quick control | Automation, shell scripts, CI pipelines |
| App tray | System tray icon with a brightness submenu and quick actions | Minimal desktop footprint; change effects without opening a window |
| REST + WebSocket API | Daemon’s full HTTP interface on :9420 | Integrations, agents, and anything programmatic |
The pieces walks through how these connect and which to open first.
#What’s in this section
This section takes you from zero to a fully configured rig.
Getting set up
- Choose your install: prebuilt vs. packaged vs. source, by OS and skill level
- Installation: full install instructions for every path
- The pieces: mental model of the daemon, app, tray, TUI, CLI, and web UI, and how they connect
- Scope: what Hypercolor does and does not control today
First steps
- First launch: what happens on first run: the welcome wizard, device discovery, autostart
- Your first 10 minutes: opinionated happy path from opening the app to a saved scene
- Quick start: zero to RGB in five minutes via CLI and web UI
- First session: longer hands-on walkthrough covering the full feature set
Going deeper
- The TUI: terminal dashboard with LED preview, audio spectrum, and fullscreen mode
- Finding devices: USB discovery, network mDNS, pairing Hue and Nanoleaf, udev permission fixes
- Audio setup: configure an audio loopback source for audio-reactive effects
- Scenes and snapshots: save full rig state and connect external automation
- Configuration: full config reference for
hypercolor.toml - Desktop app: the Tauri shell: tray menu, autostart, diagnostics, window controls
Reference
#How the engine works
graph LR subgraph Input A[Audio FFT] B[Screen capture] C[Keyboard / MIDI] endsubgraph Engine D[Effect renderer<br>Servo · Canvas · GLSL] E[Canvas<br>640×480 default] SF[SparkleFlinger<br>compositor] F[Spatial sampler] end subgraph Hardware G[Razer · Corsair · ASUS<br>USB / HID / SMBus] H[WLED · Hue · Nanoleaf · Govee<br>UDP / REST / mDNS] I[QMK · Ableton Push 2<br>USB HID / MIDI] end A & B & C --> D D --> E --> SF --> F F --> G & H & I
Effects render into a virtual RGBA canvas (640×480 by default, tunable). SparkleFlinger, the render-thread compositor, latches the newest surface from each active layer at the frame boundary and blends them into one canonical frame per tick. The spatial engine samples that frame at each LED’s physical position using normalized [0.0, 1.0] coordinates, so effects stay resolution-independent regardless of canvas size. Device output is queued asynchronously so a slow device never stalls the render loop.
The daemon runs an adaptive render loop across five FPS tiers (10 / 20 / 30 / 45 / 60). The default target is 30 fps. The loop downshifts fast on consecutive budget misses and upshifts slowly on sustained headroom, so Servo-heavy effects and simpler ones share the same engine without tuning.
#Supported hardware
Hypercolor currently ships working drivers for 179 devices across 12 driver families, with 233 more researched or in progress. See the full compatibility matrix for the current state by vendor and device.
If you own hardware that is not yet supported, see contributing a driver.
Remove conflicting RGB software before starting. SignalRGB, the openrazer daemon, Armoury Crate, and iCUE can hold the same USB devices Hypercolor drives. If one of them is running, a device can show up in lsusb and never light in Hypercolor. Stop them first. The Devices page warns when it finds one, and hypercolor diagnose names it too. OpenRGB is the exception: it can run beside Hypercolor, as Conflicting software explains.
#Effects
Hypercolor renders effects through an embedded Servo browser (HTML Canvas and WebGL2 / GLSL) and a set of native Rust built-ins compiled directly into the engine. Browse the full library in the effect catalog, or head to the effects section to learn how to write your own.
The TypeScript SDK is published to npm as hypercolor. Scaffold a workspace with bun create hypercolor; see effects setup.
#Interfaces
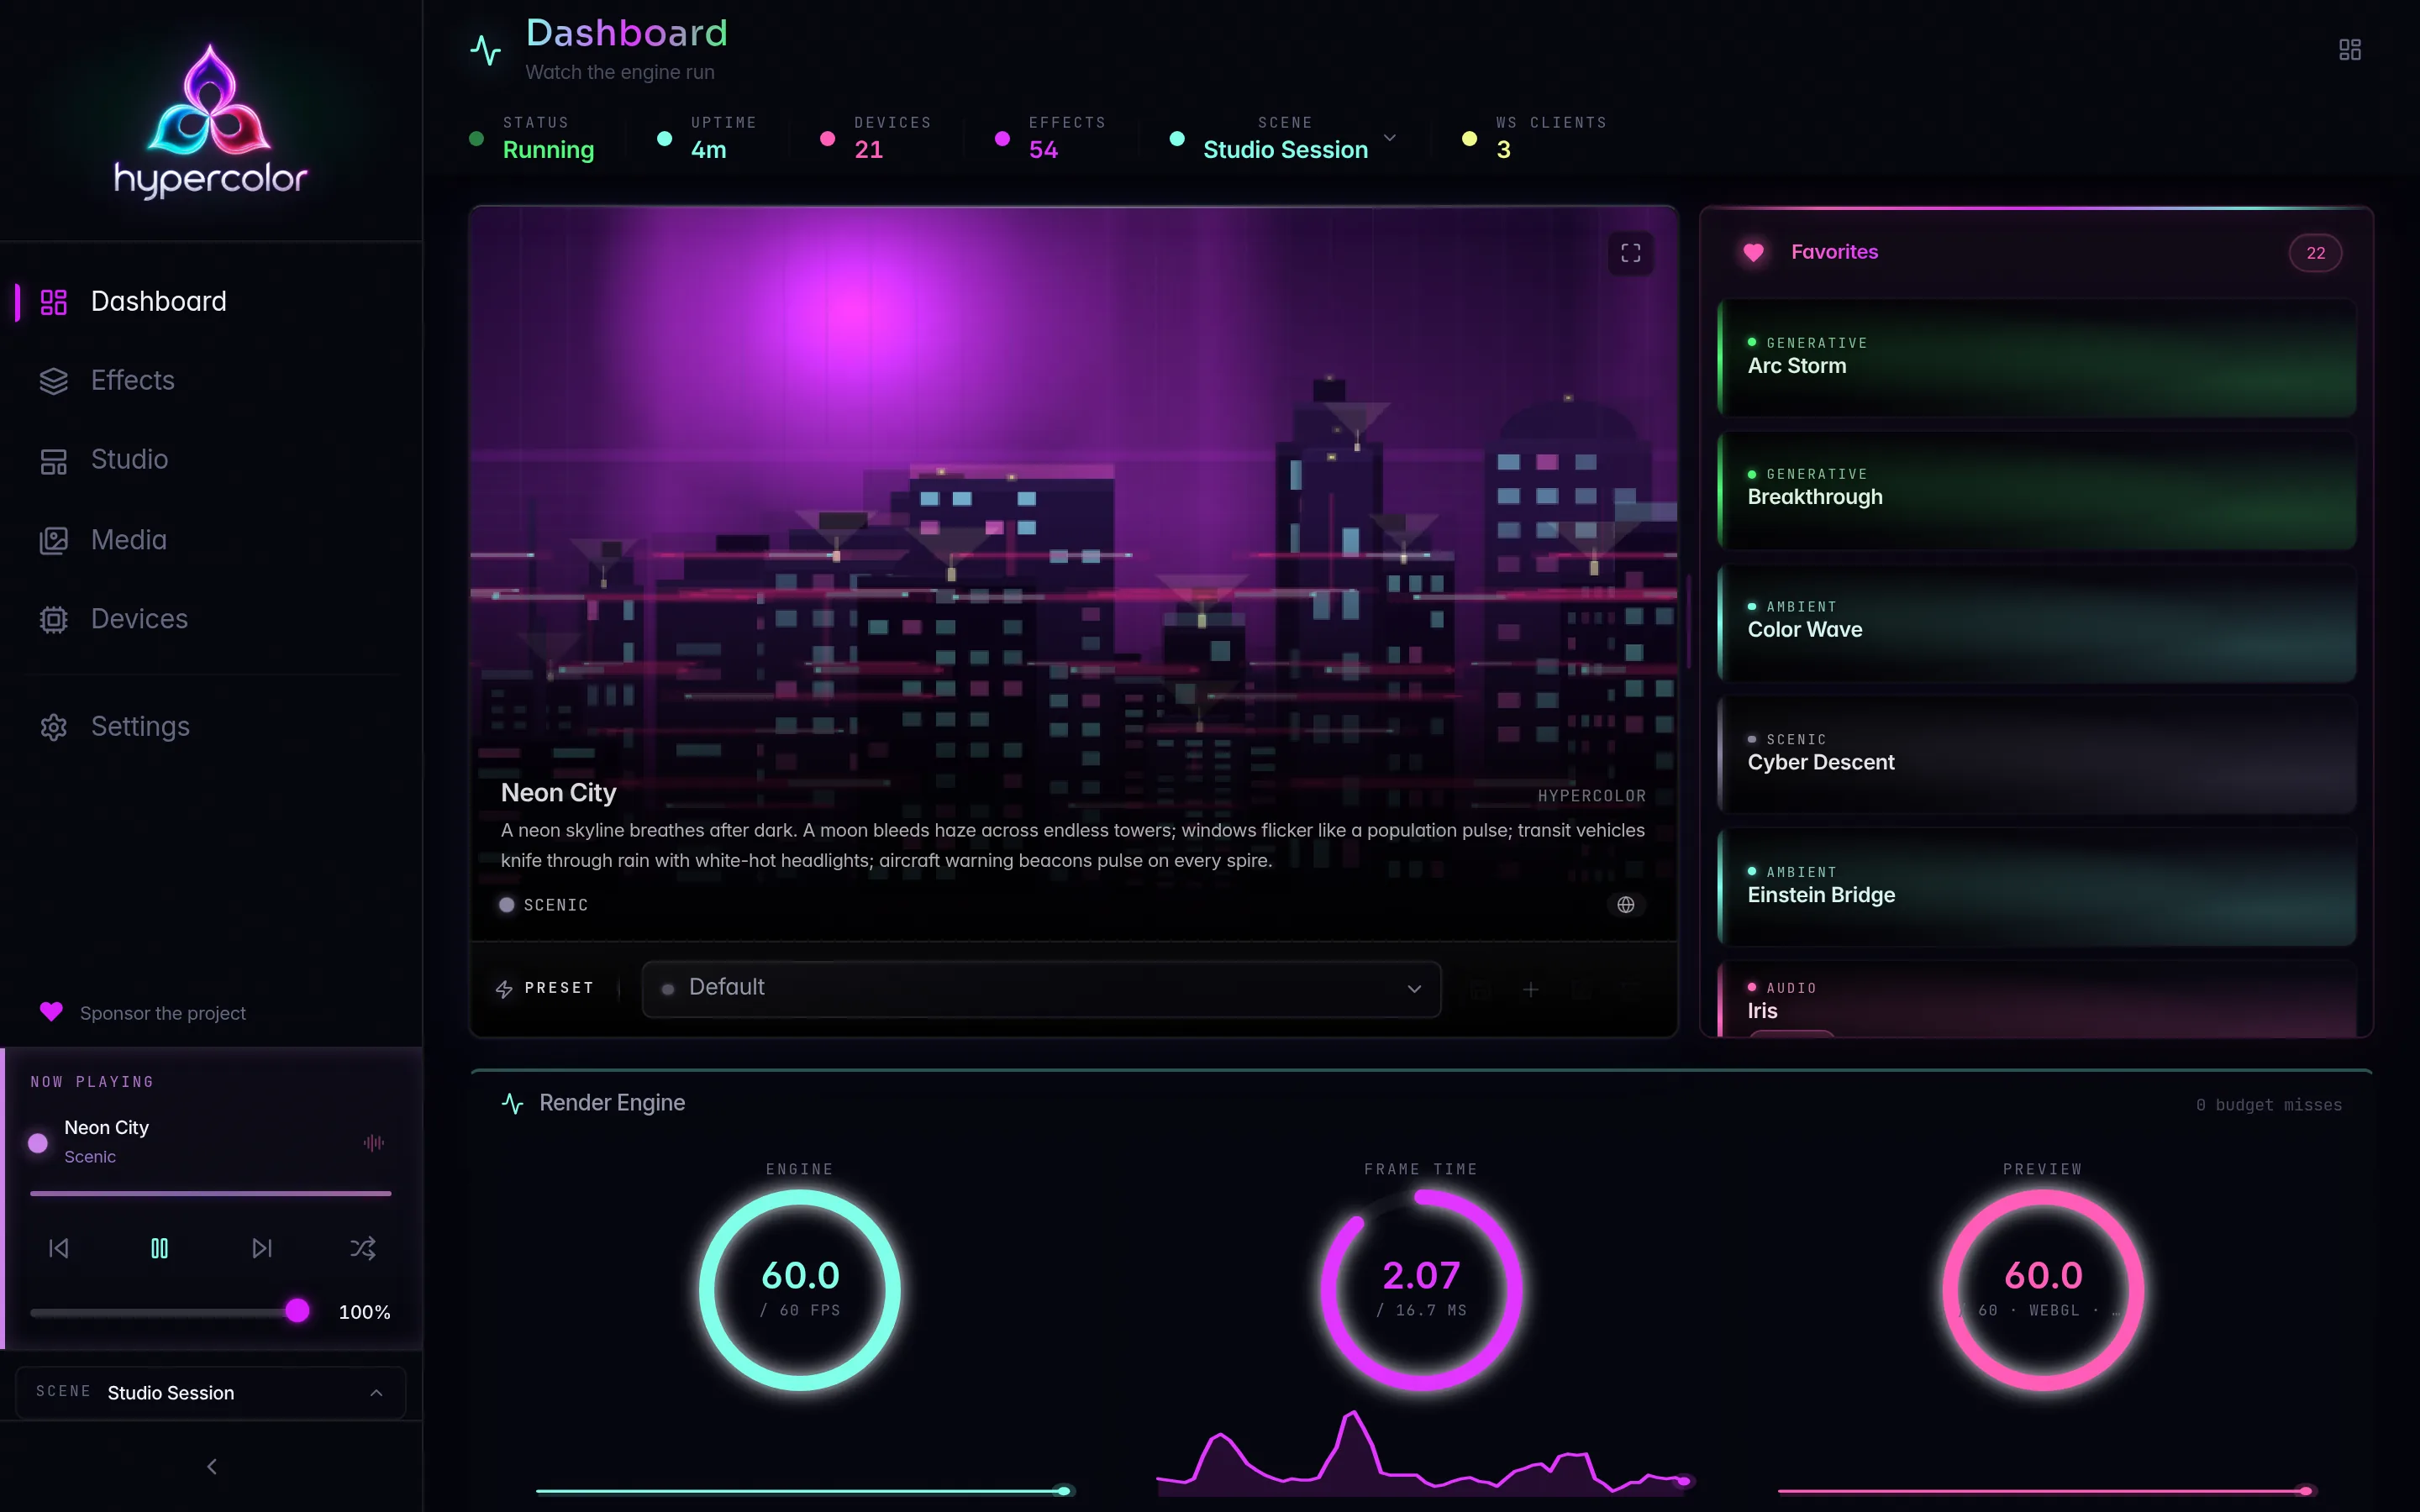
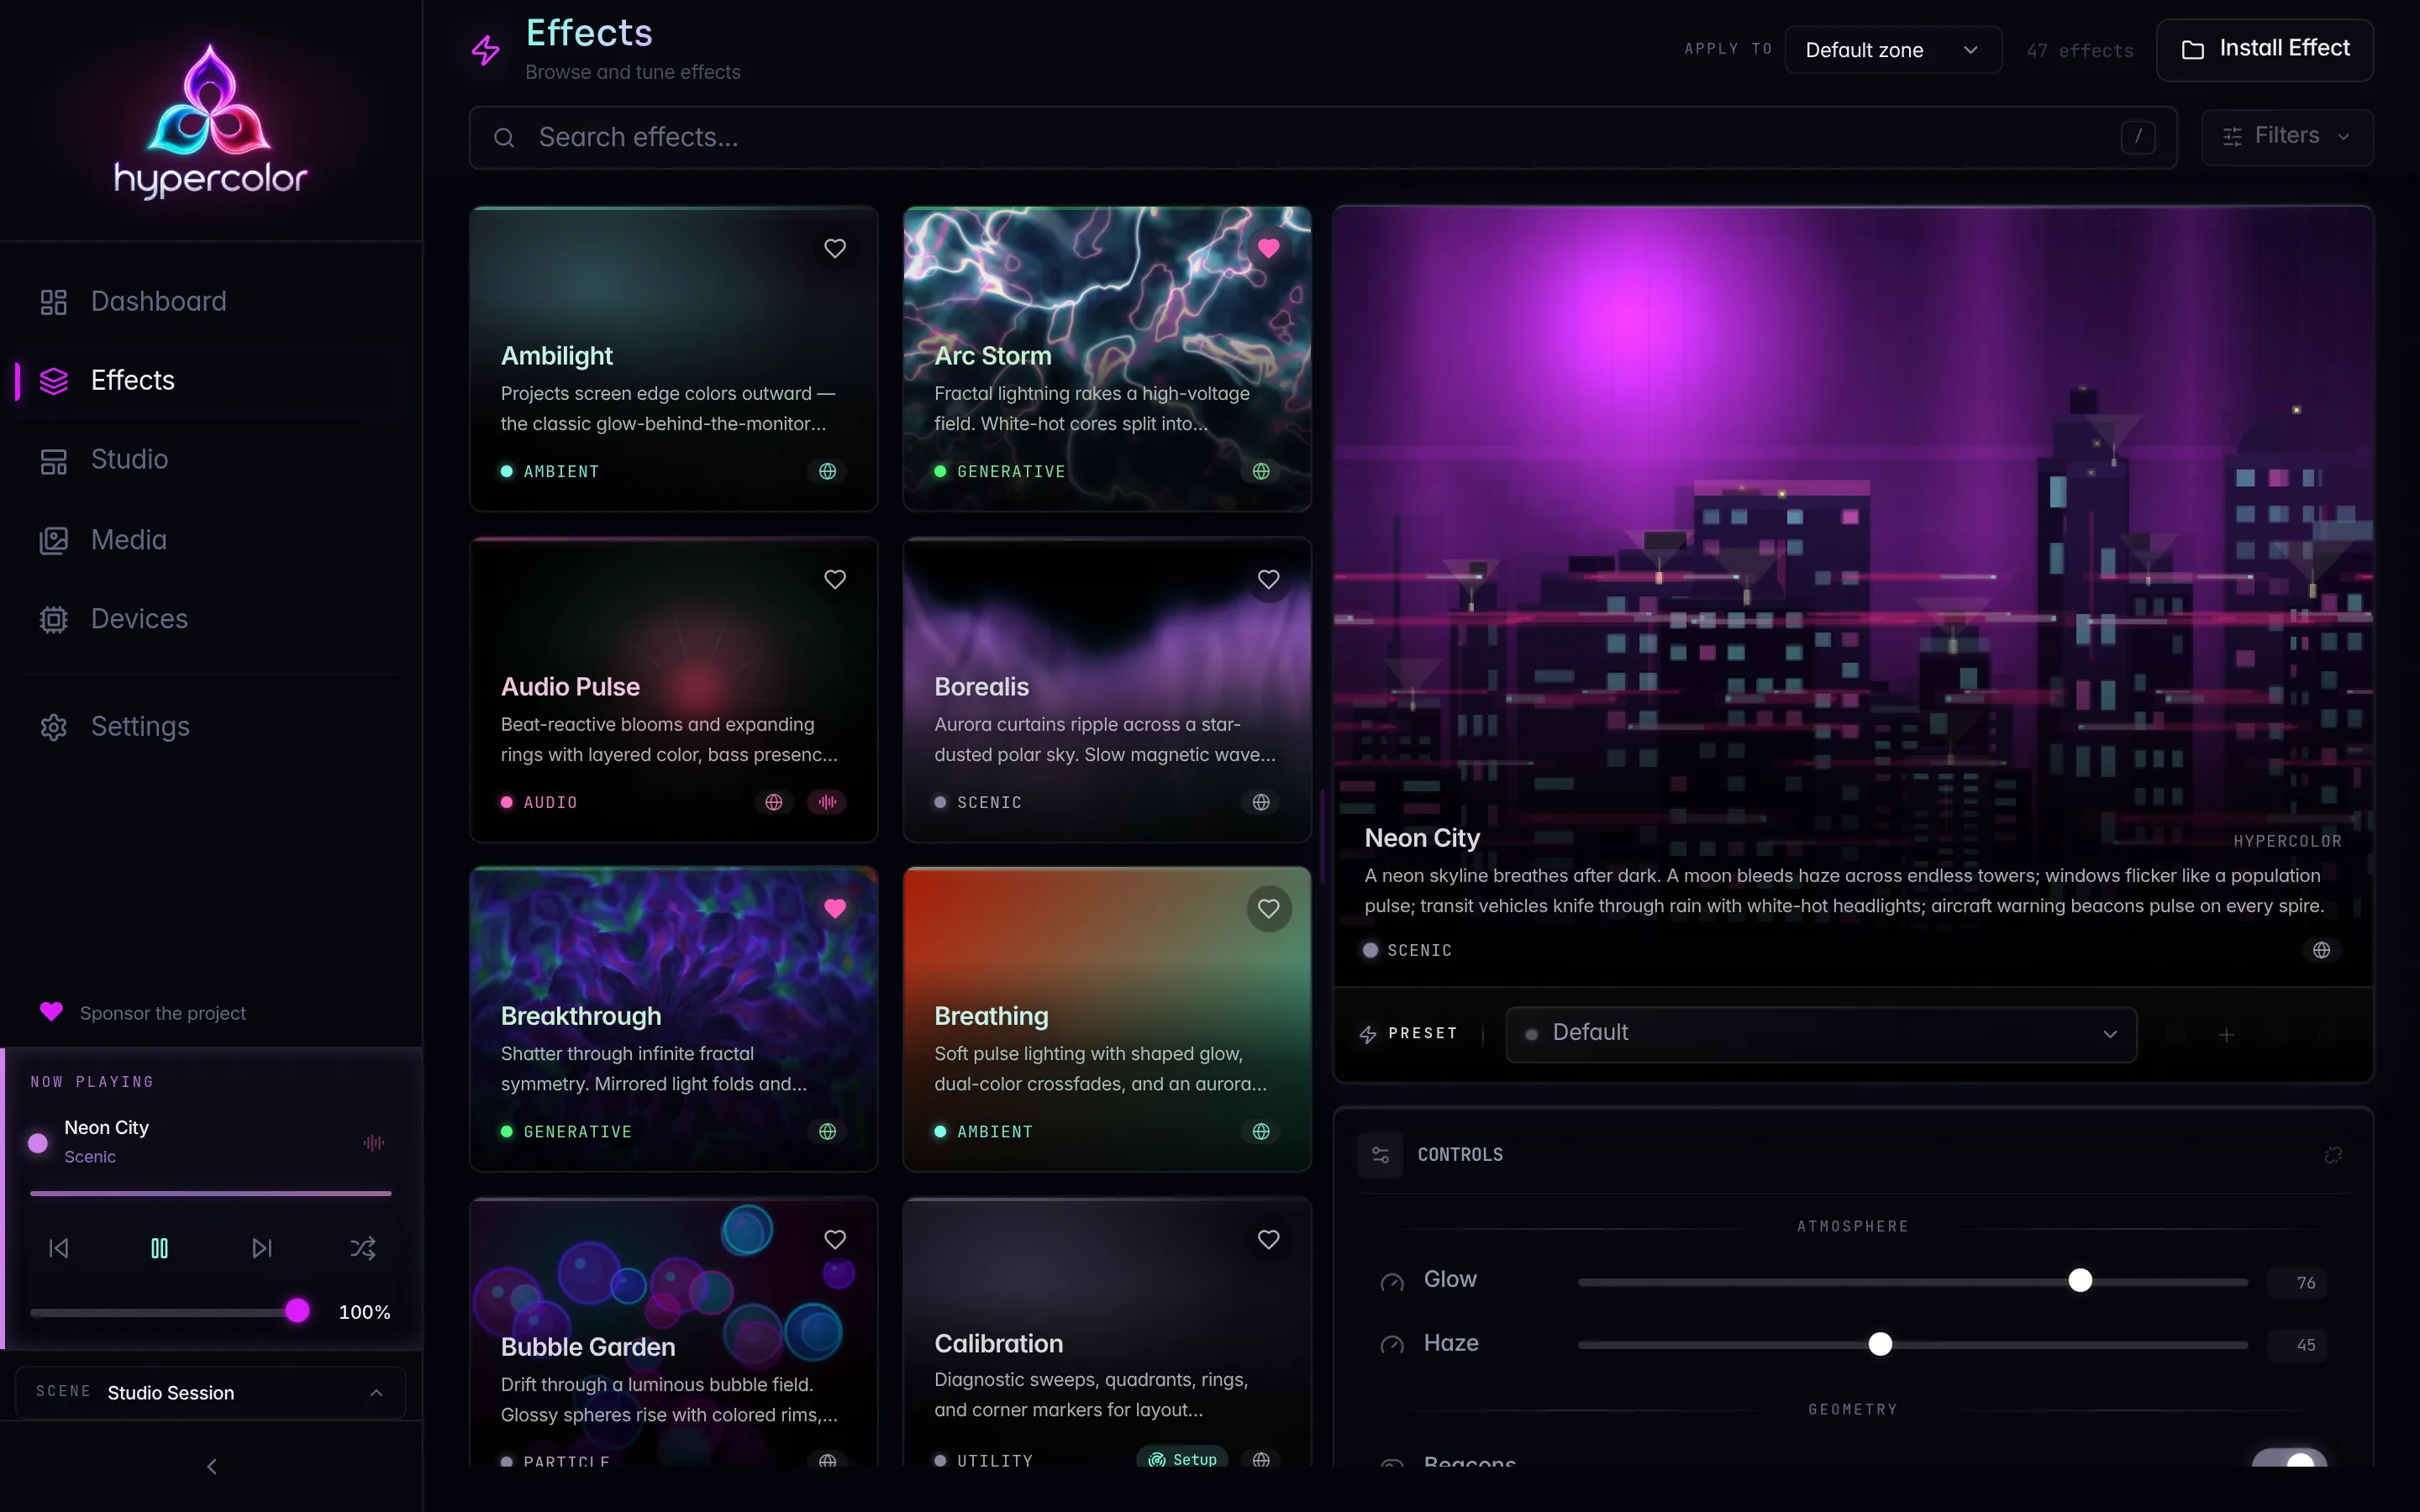
Web UI: served by the daemon at http://localhost:9420 with no separate process needed. Browse effects, adjust controls live, manage devices, and design spatial layouts from any browser.
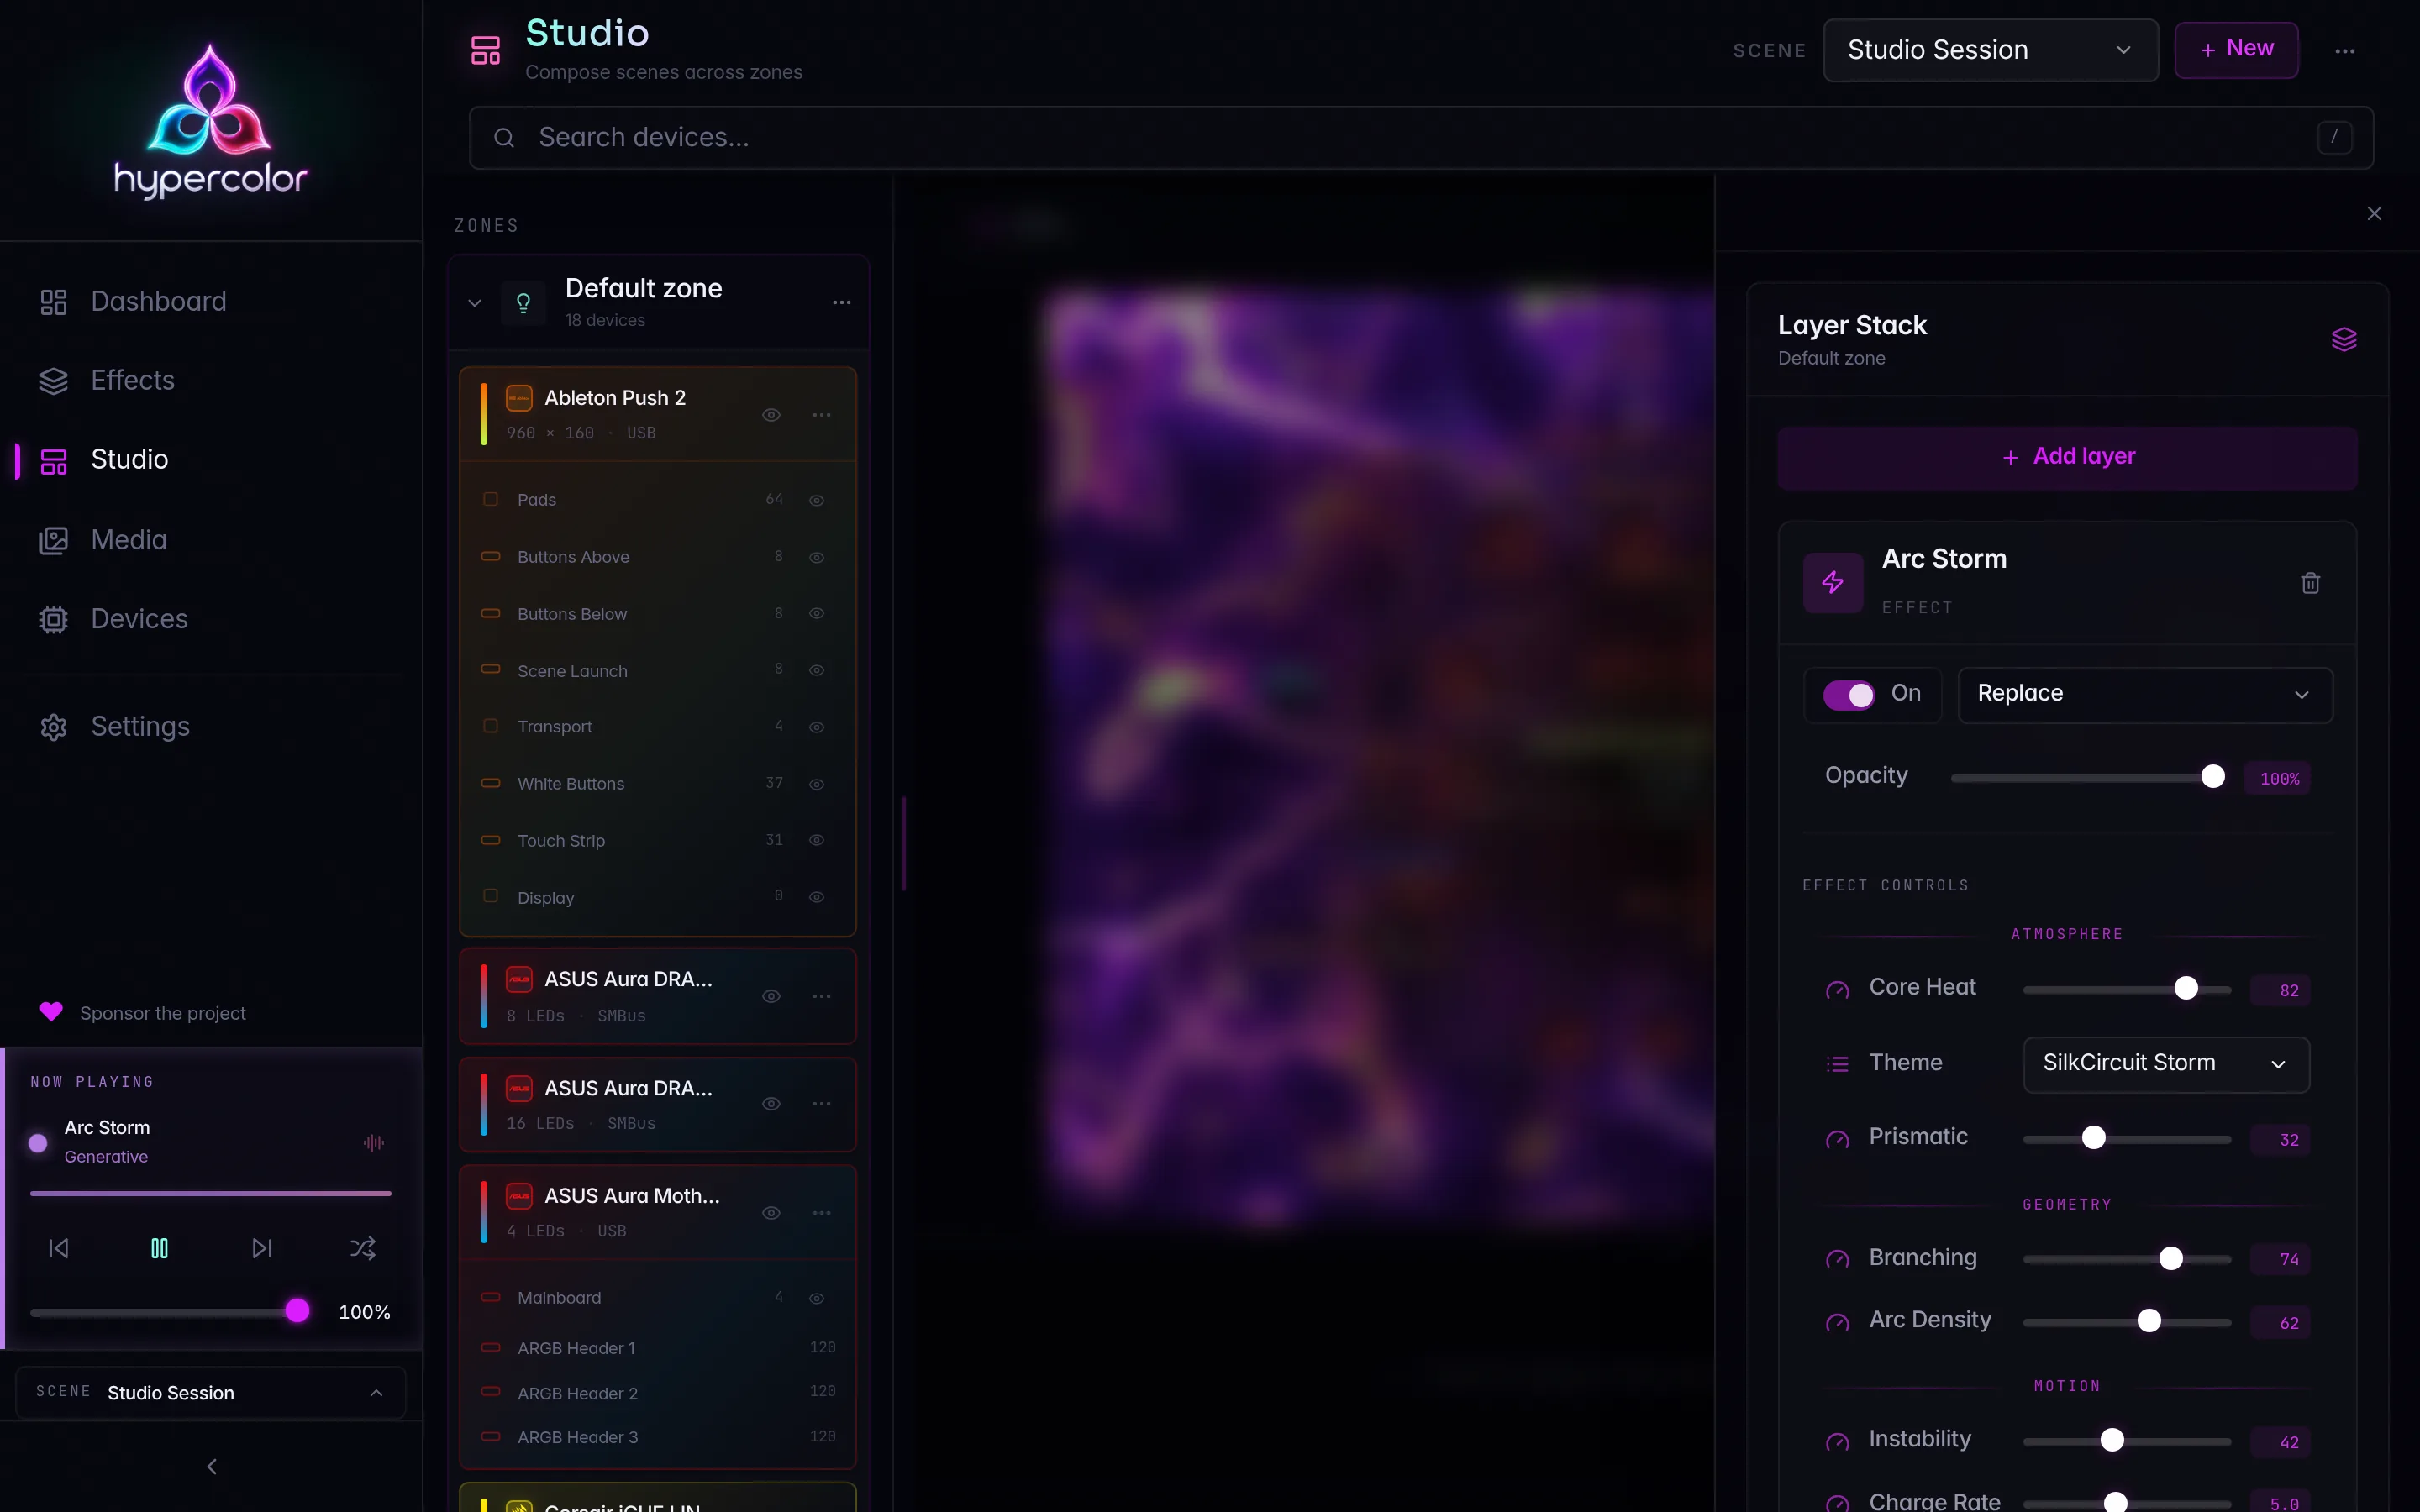
Studio: the zone editor inside the web UI. Divide your canvas into zones, each running an independent effect with its own controls. See the Studio section for the full walkthrough.
TUI: a Ratatui terminal dashboard with true-color LED preview, audio visualization, and fullscreen effect rendering.
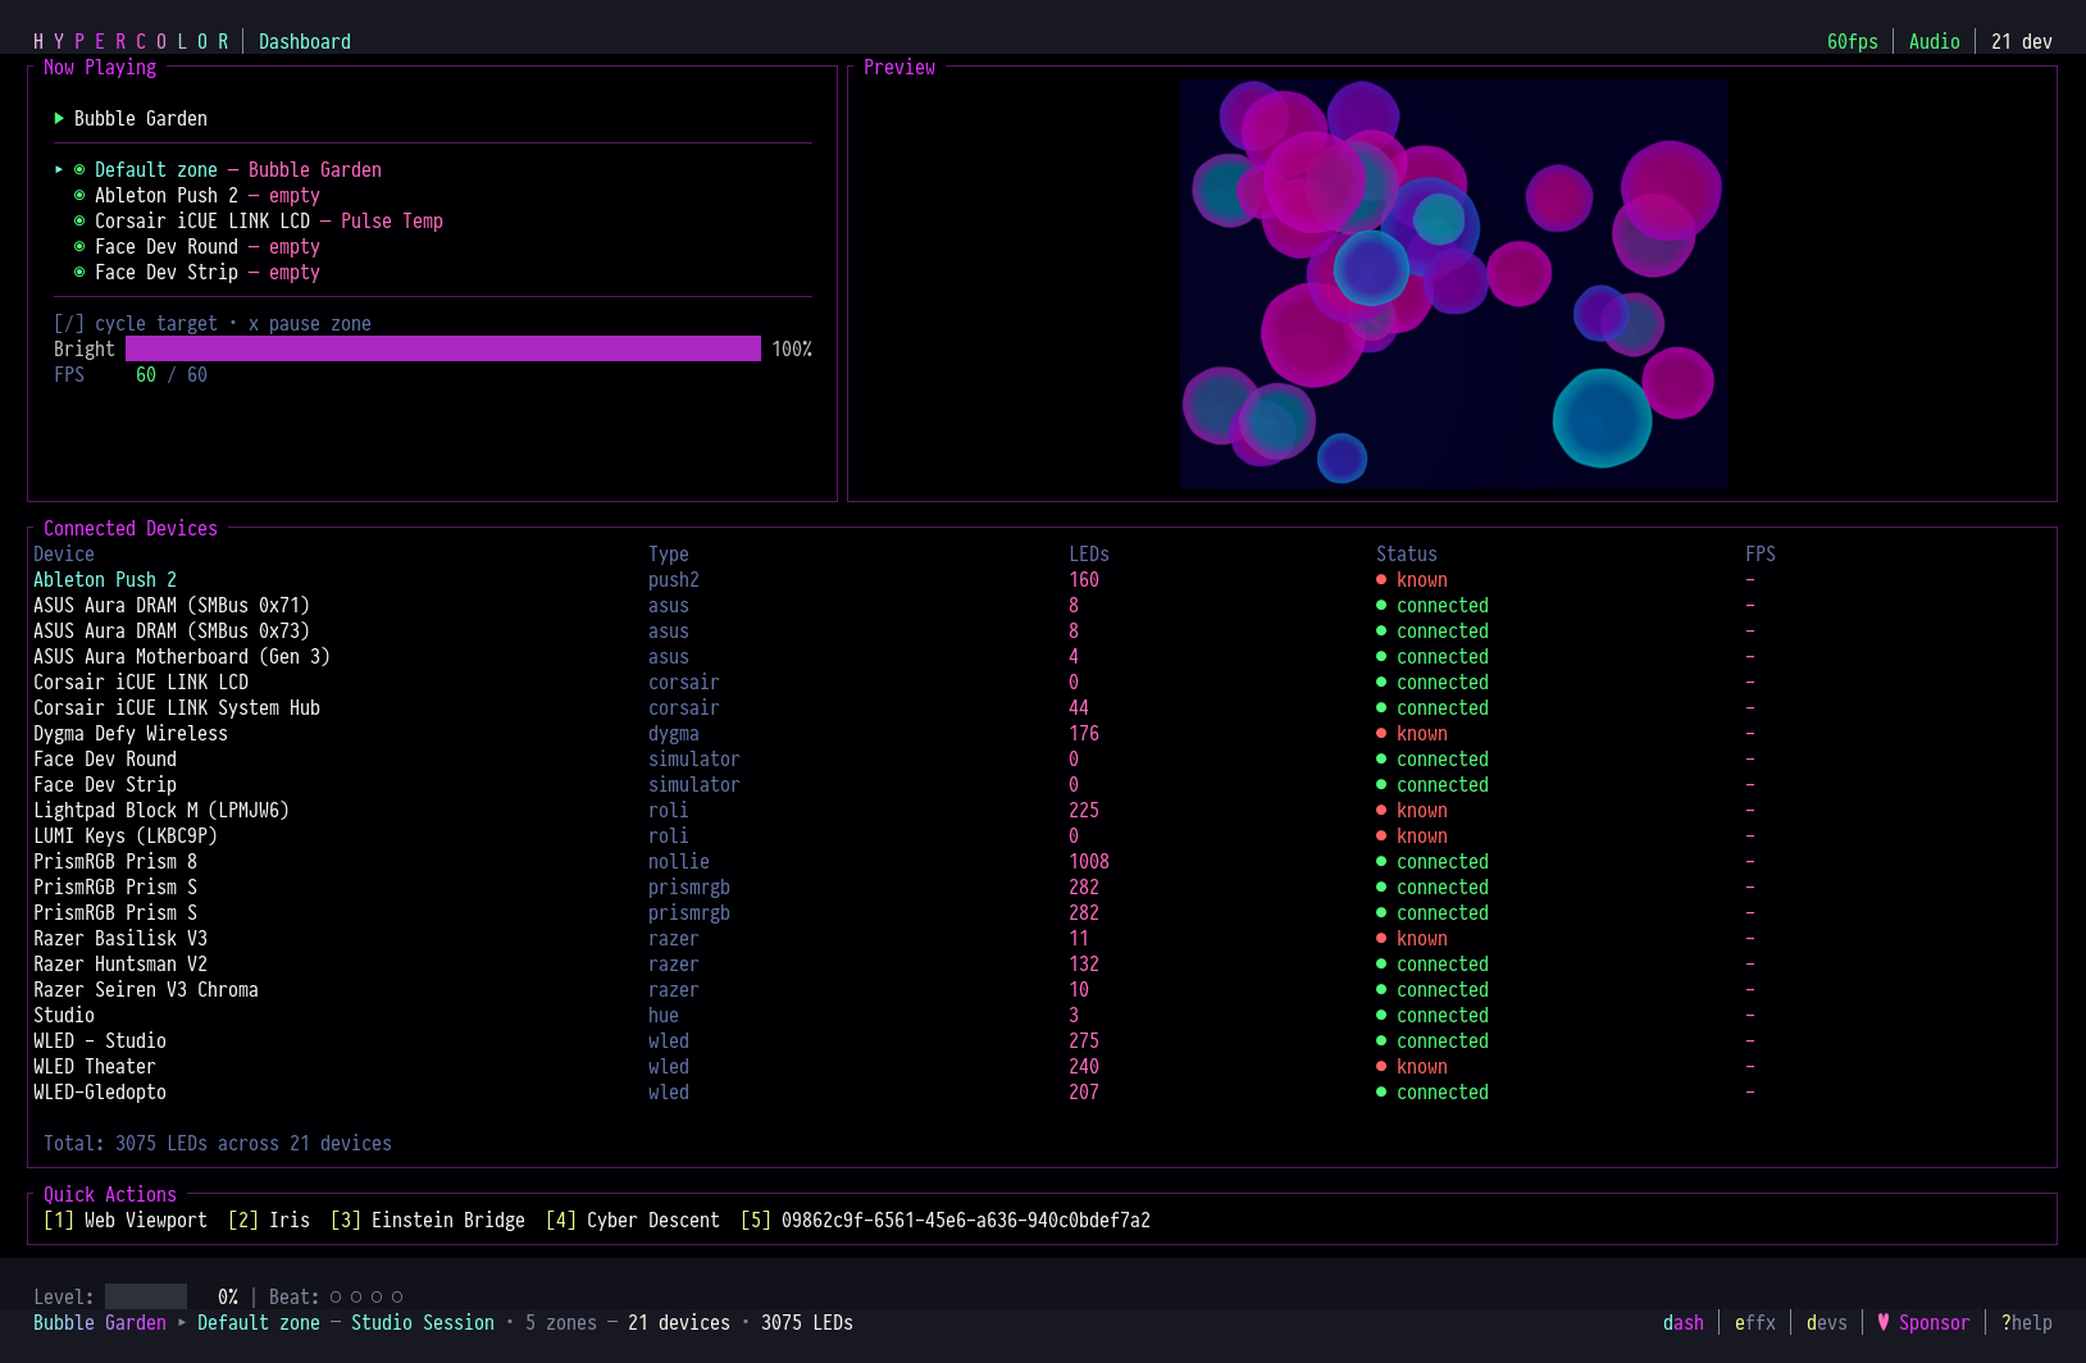
CLI: the hypercolor binary talks to the daemon over HTTP. Every action you can take in the UI is available via the CLI. See the CLI reference.
MCP server: 18 tools, 5 resources, and 4 prompts for AI assistant integration (Claude Code, Cursor, and friends). The MCP server is disabled by default; see the MCP server reference for how to enable it and connect your agent.
#Getting help
If something is not working, start with hypercolor diagnose: it runs a health check and prints a summary of what the daemon can see. From there, the troubleshooting section has symptom-first answers for the most common issues: devices not found, audio not reacting, network discovery failures, and performance problems.
In this section
Choose your install
Pick the right Hypercolor install path for your OS and skill level: prebuilt, packaged, or source.
Installation
Install Hypercolor on Linux, Windows, and macOS. Prebuilt packages and one-line installers first; source build is a labeled developer section.
Docker
Run Hypercolor on a Linux server with Docker, the web UI, HTML effects, and network lighting.
How Linux release installs are managed
Where the Linux release installer puts releases and update state, how it adopts older installs, what uninstall removes and keeps, and which directory states it refuses.
The pieces
Mental model: daemon, app, tray, TUI, CLI, and web UI. What each is, when to use it, and how they all connect on :9420.
What Hypercolor controls (and what it doesn't)
Which devices Hypercolor drives today, what it does not control yet, and how to find out whether your hardware is supported.
First launch
What happens the first time Hypercolor runs: app starts, daemon boots, single-instance guard, the first-run wizard, and the tray appearing.
Scenes & snapshots
Save, activate, and automate whole-rig lighting with scenes, snapshot mode, and start_scene boot restore.
Quick start
Zero to RGB in five minutes, including a no-hardware simulator path and a conflicting-software callout.
Your first 10 minutes
Open the app, see your devices, apply an effect, dial in brightness, and capture a scene: from zero to lit in under ten minutes.
Your first session
Hands-on walkthrough from daemon start to a saved, audio-reactive setup: devices, effects, layouts, scenes, and Studio.
The terminal UI (TUI)
Launch the Ratatui TUI, navigate its panels, browse effects, and read the live spectrum view.
Finding devices
USB auto-discovery, mDNS network scanning, pairing network devices for credentials, identify, and udev permission fixes.
Audio setup
Make your lights react to music: pick the right monitor or loopback source on Linux, Windows, and macOS, and verify with the TUI spectrum strip.
Input capture
Let effects react to your keyboard and mouse: how consent works, what Hypercolor can and cannot see on Linux and Windows, and why a Windows service sees nothing.
Configuration
The hypercolor.toml reference: every section and key, their defaults, and the CLI and REST config surface.
Desktop app
The Tauri shell: window, tray menu, pause/resume, brightness submenu, autostart, export diagnostics, logs and effects folders.
Uninstall & reset
Remove Hypercolor cleanly: stop the daemon, remove binaries, udev rules, systemd units, launchd plists, autostart entries, and config directories.
Changelog & versions
How Hypercolor versioning works, where release notes live, and the channels every release ships through.